Original: $198.85
-65%$198.85
$69.60The Story
Description
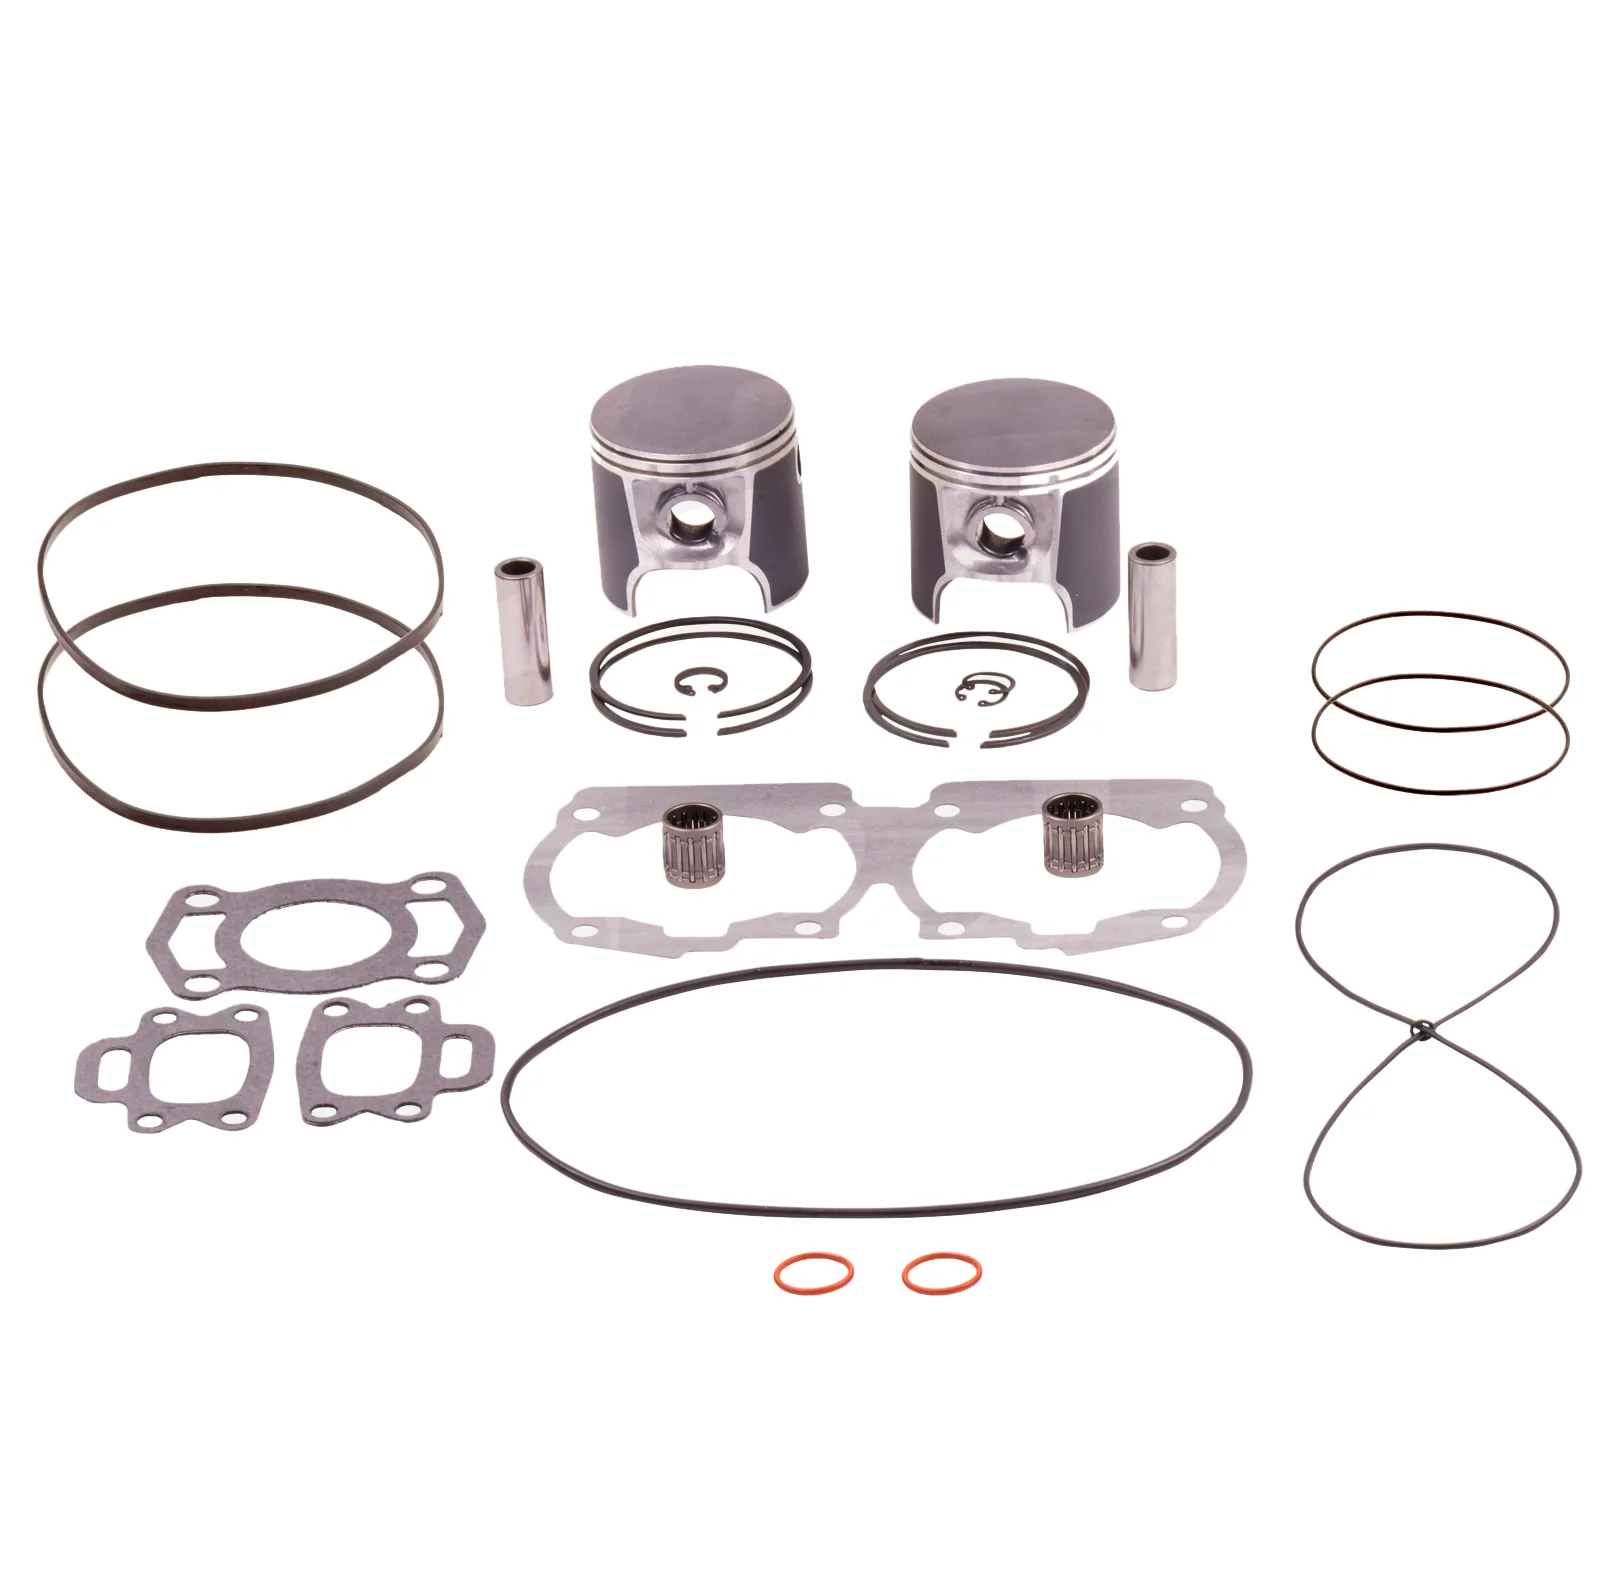
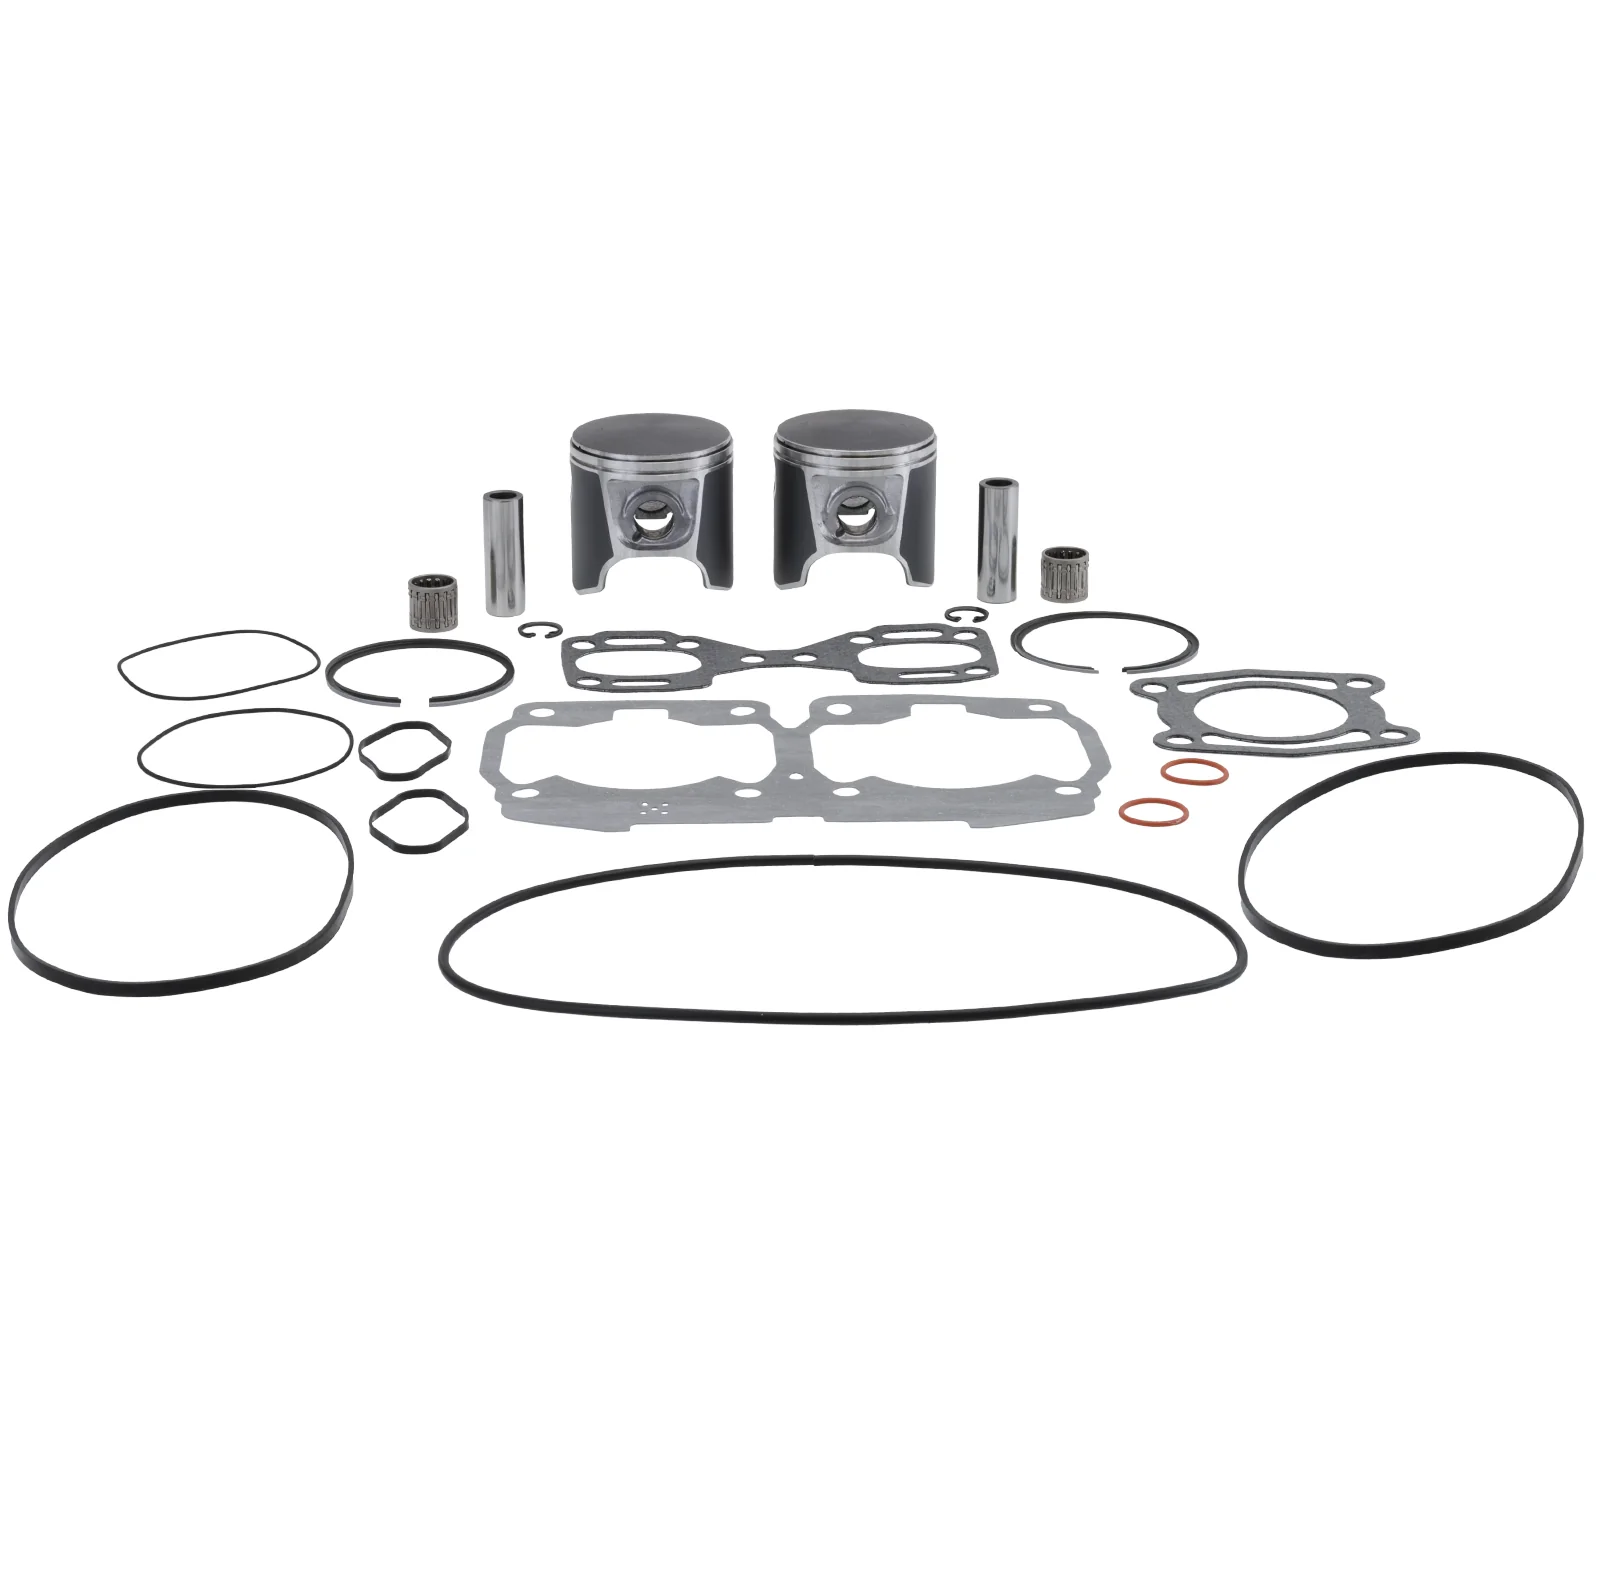
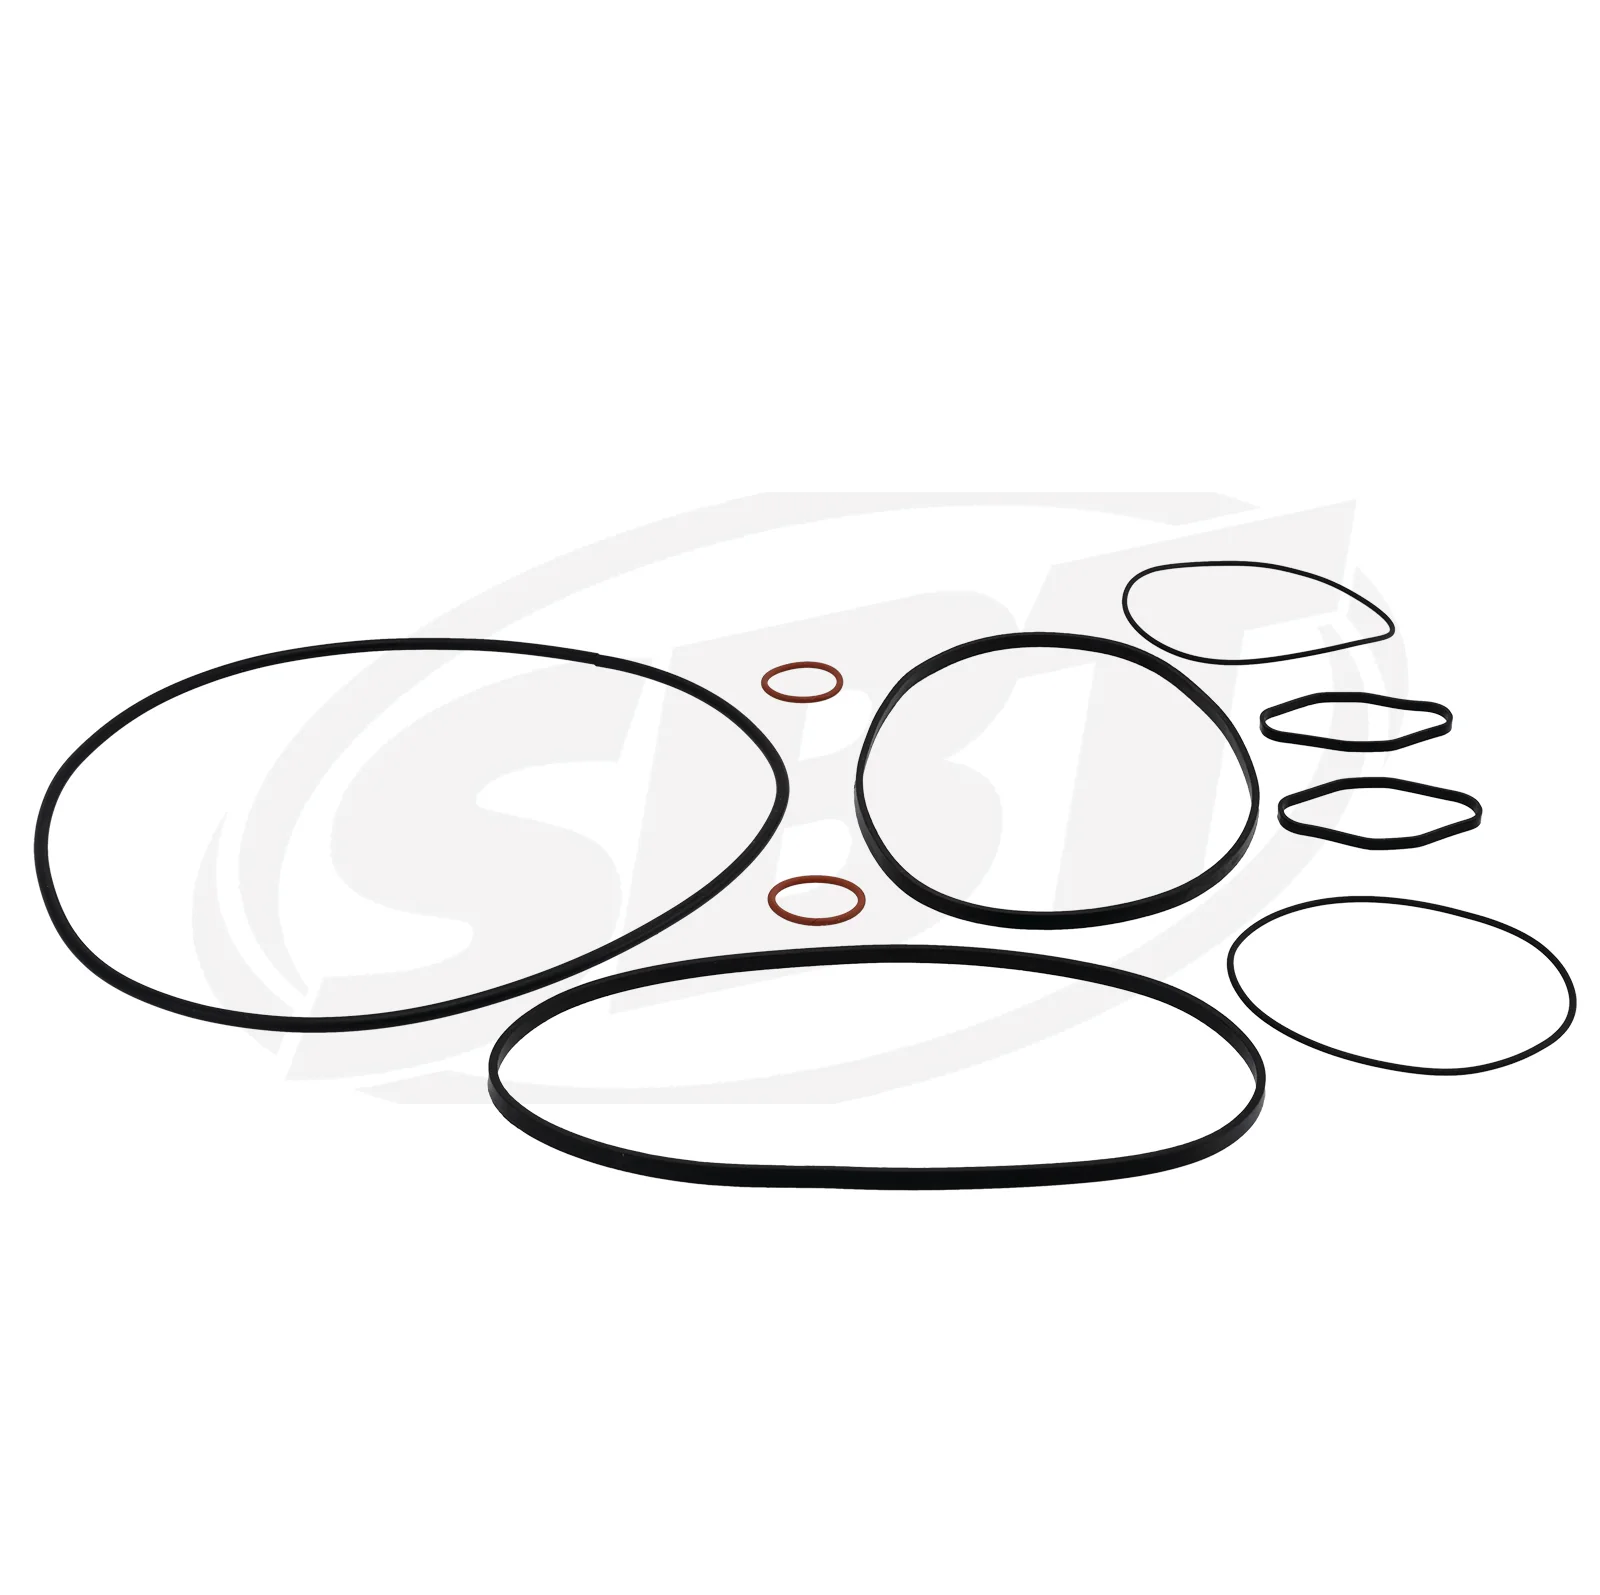
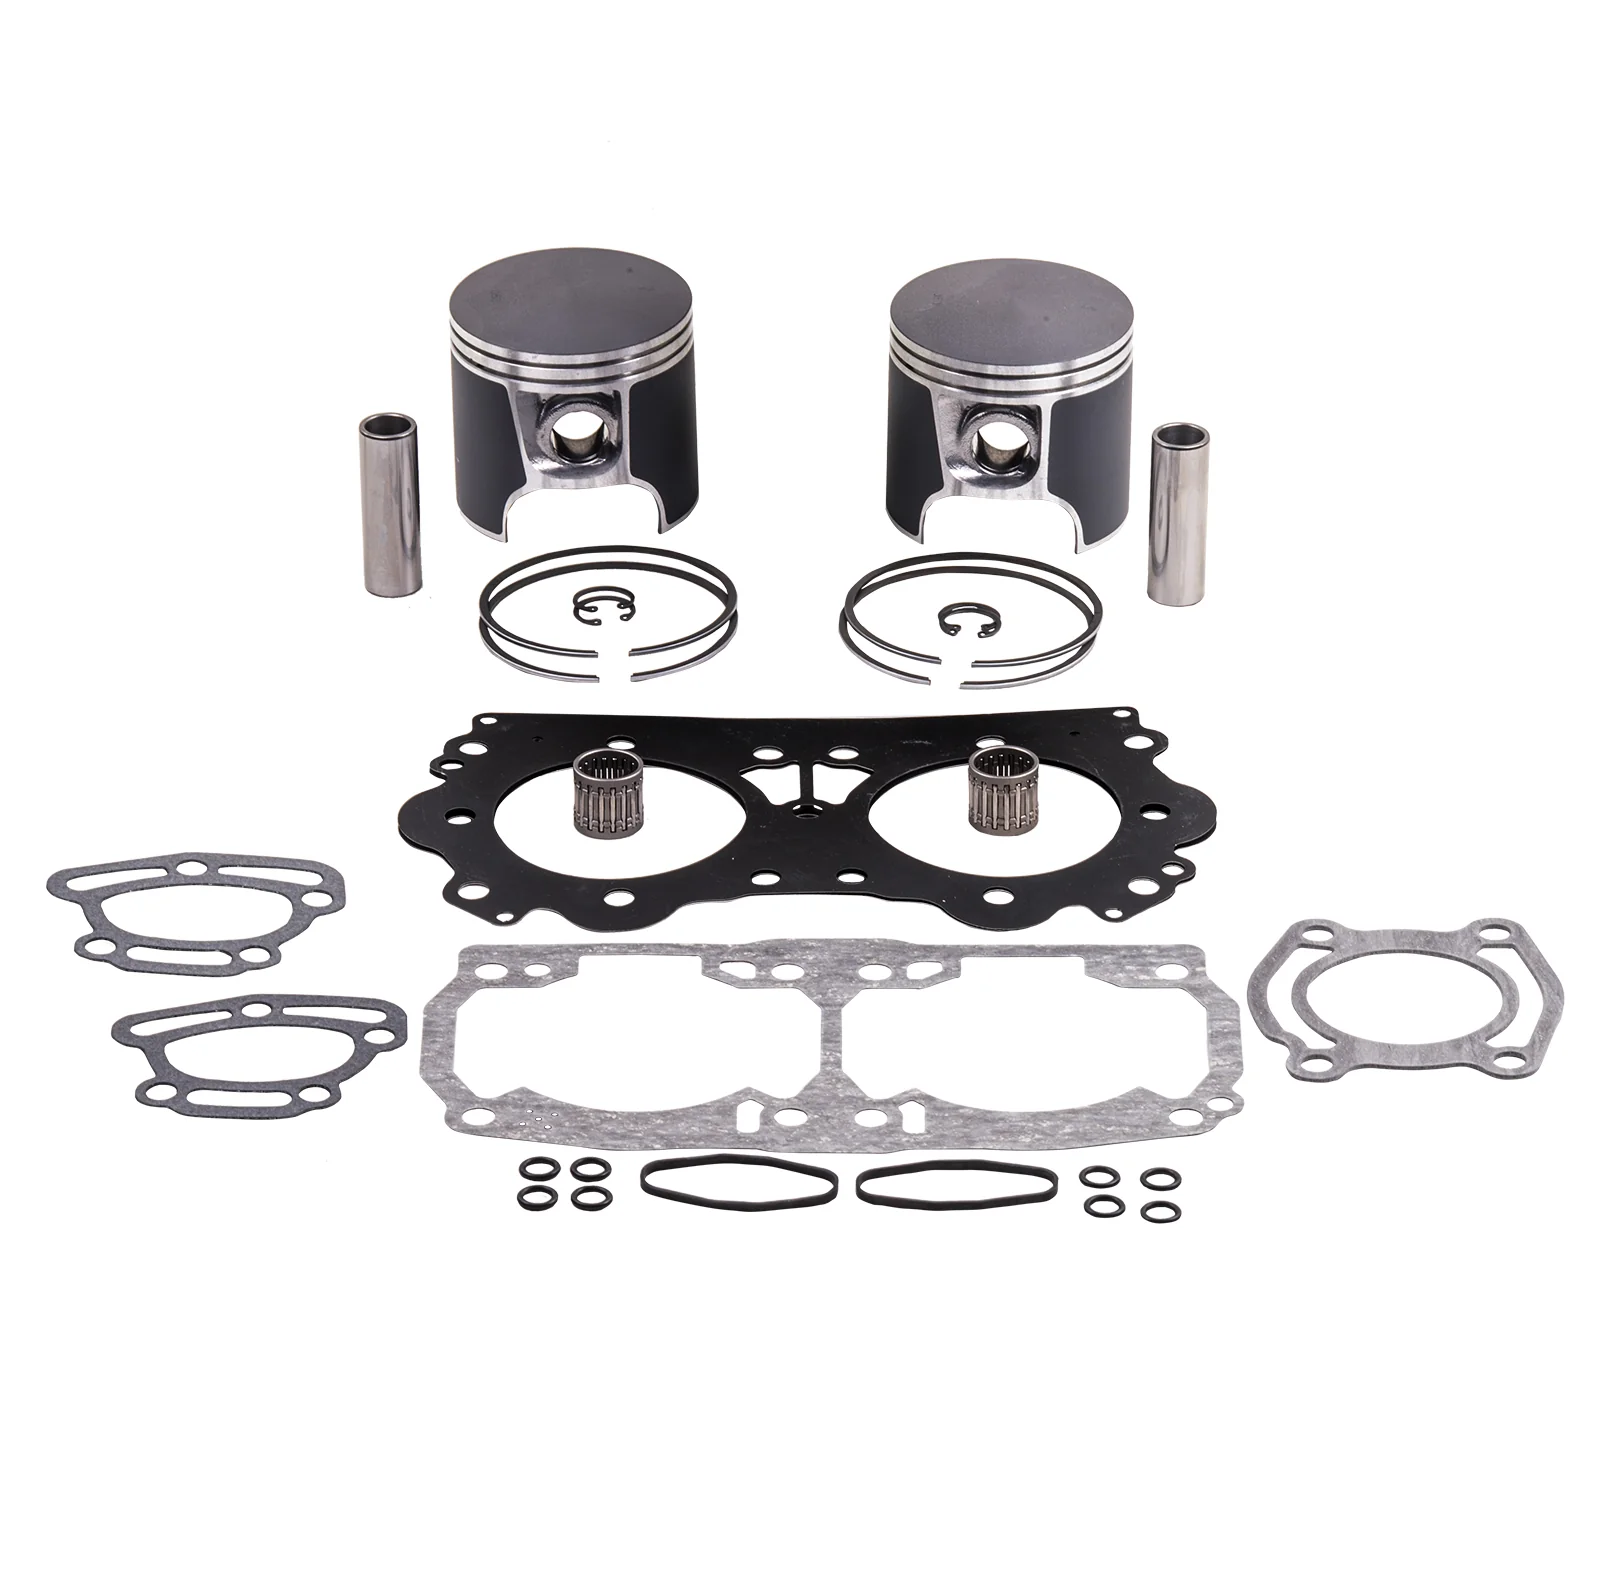
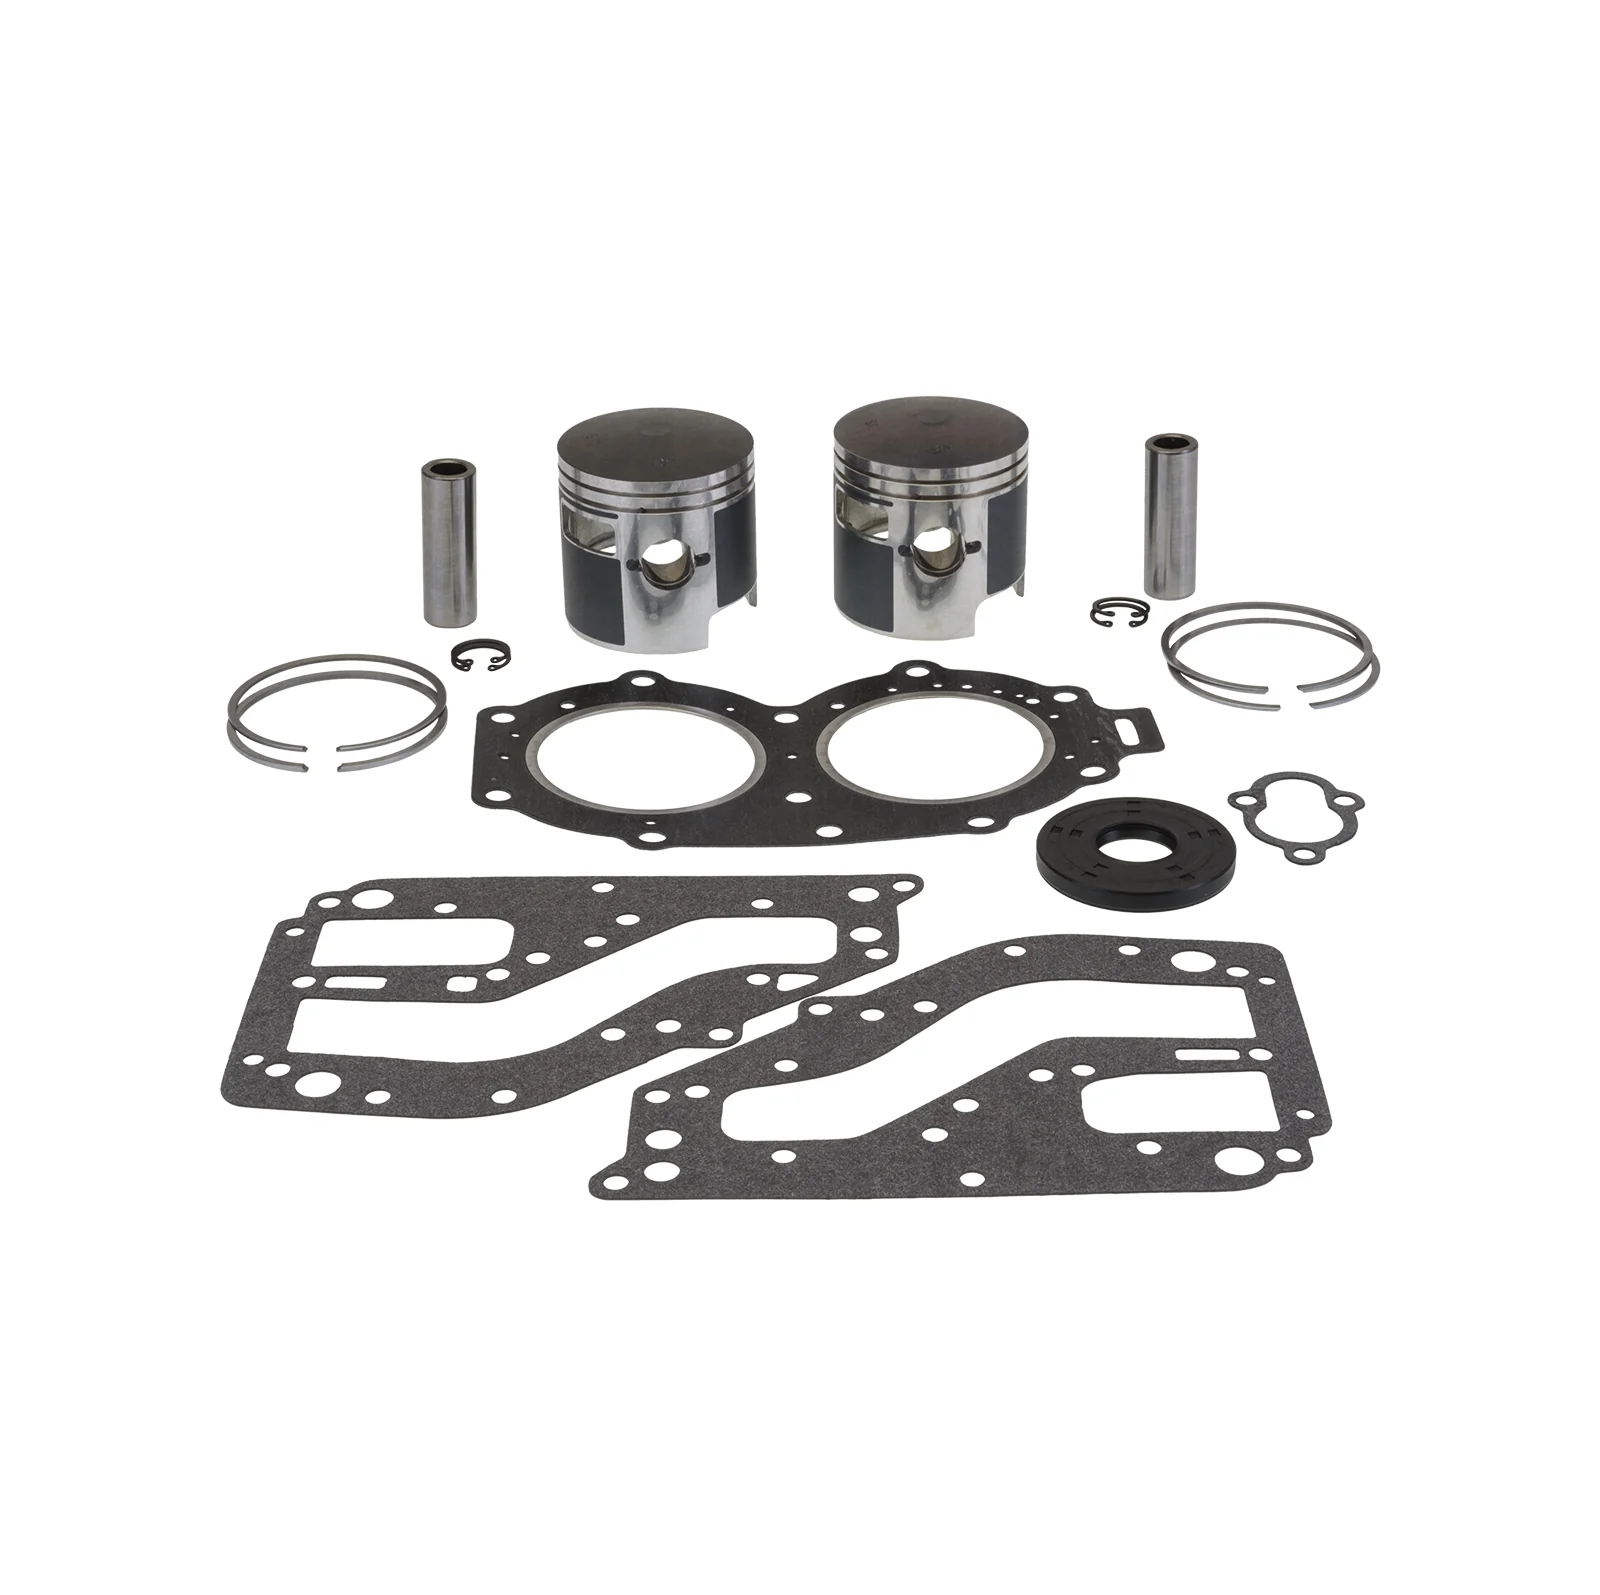
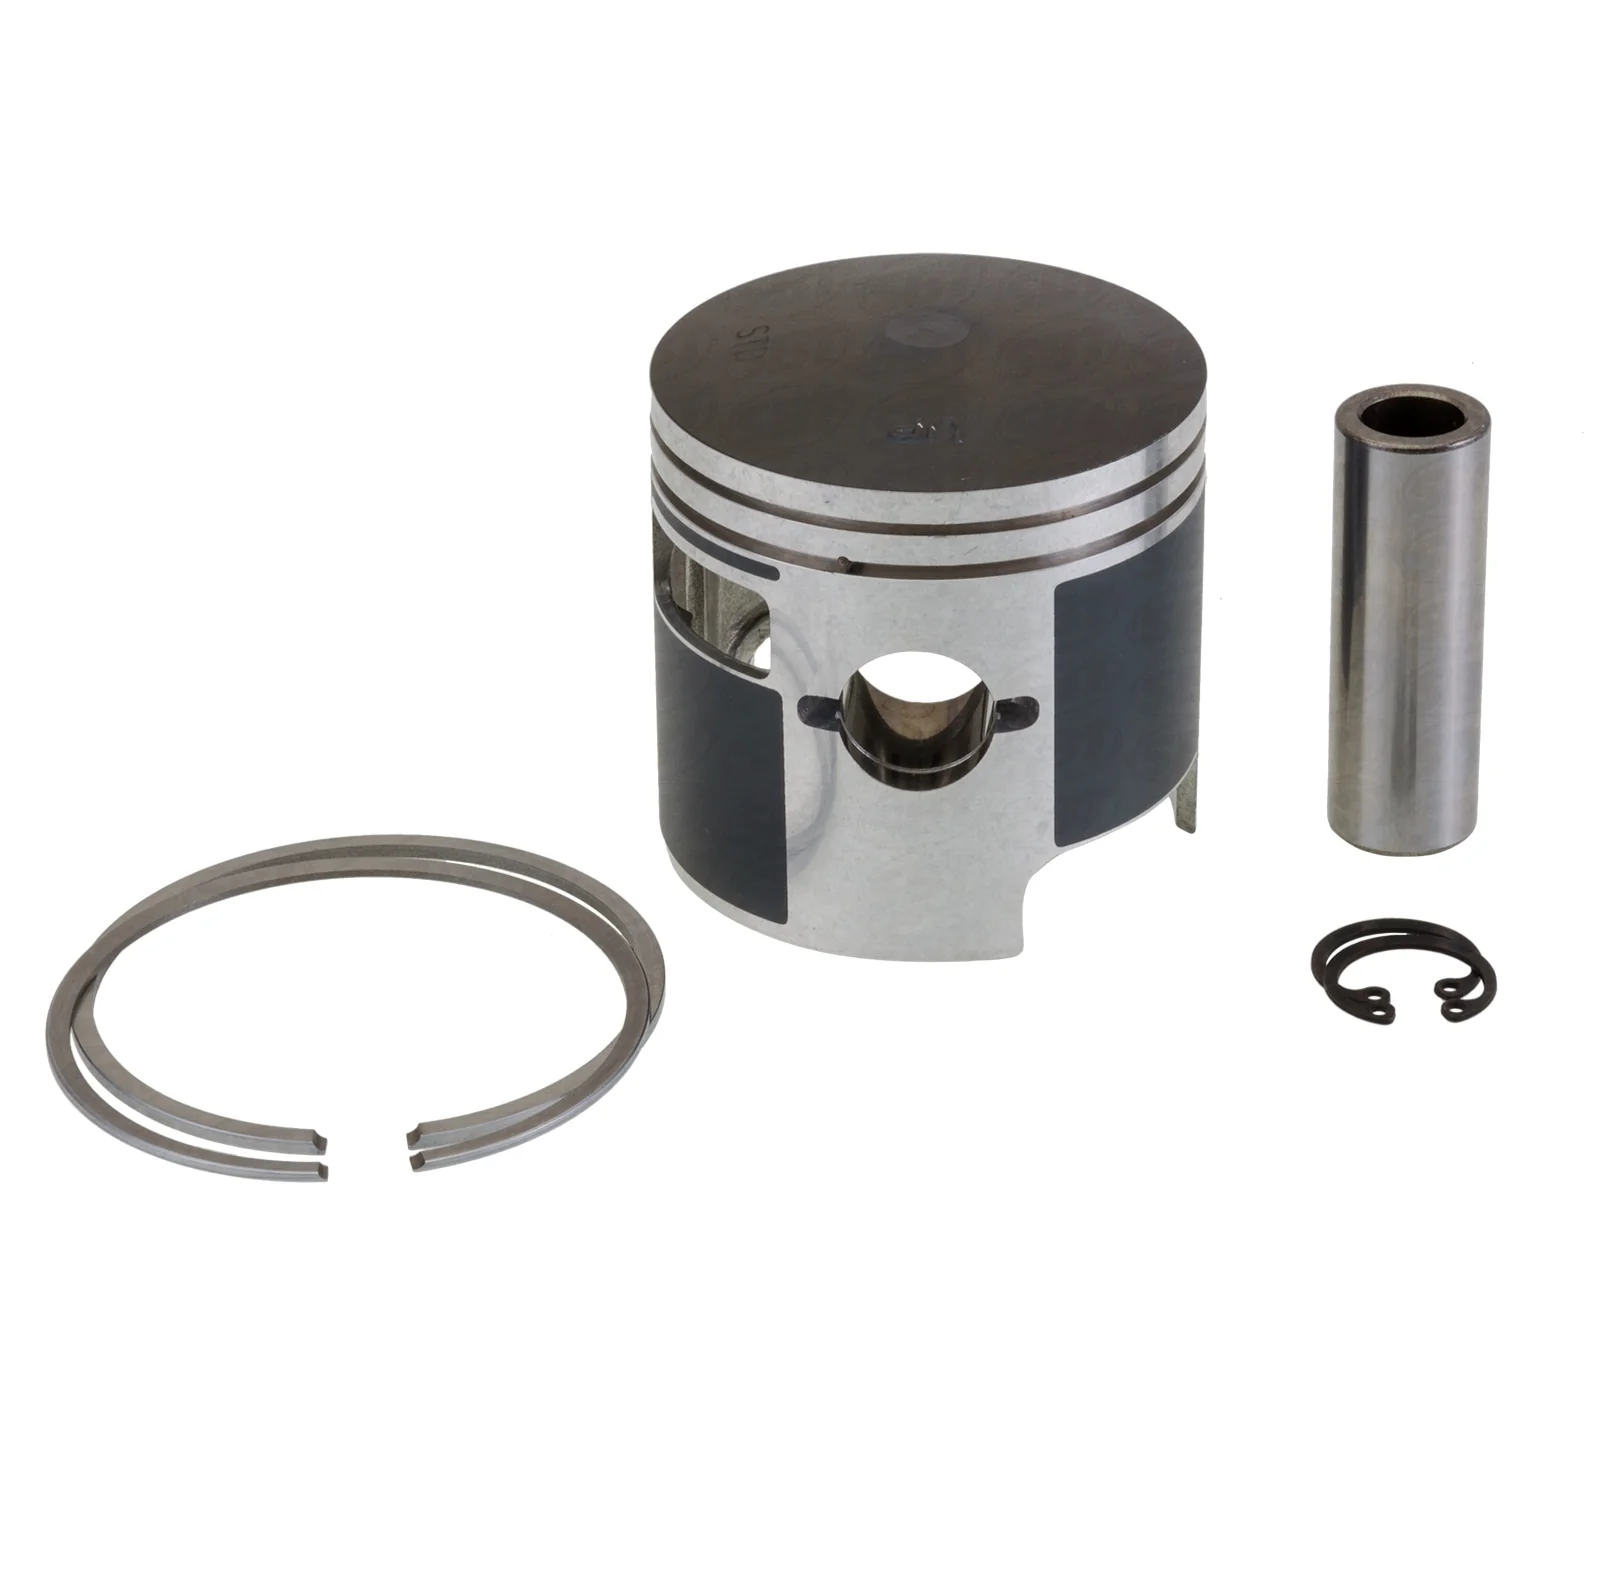
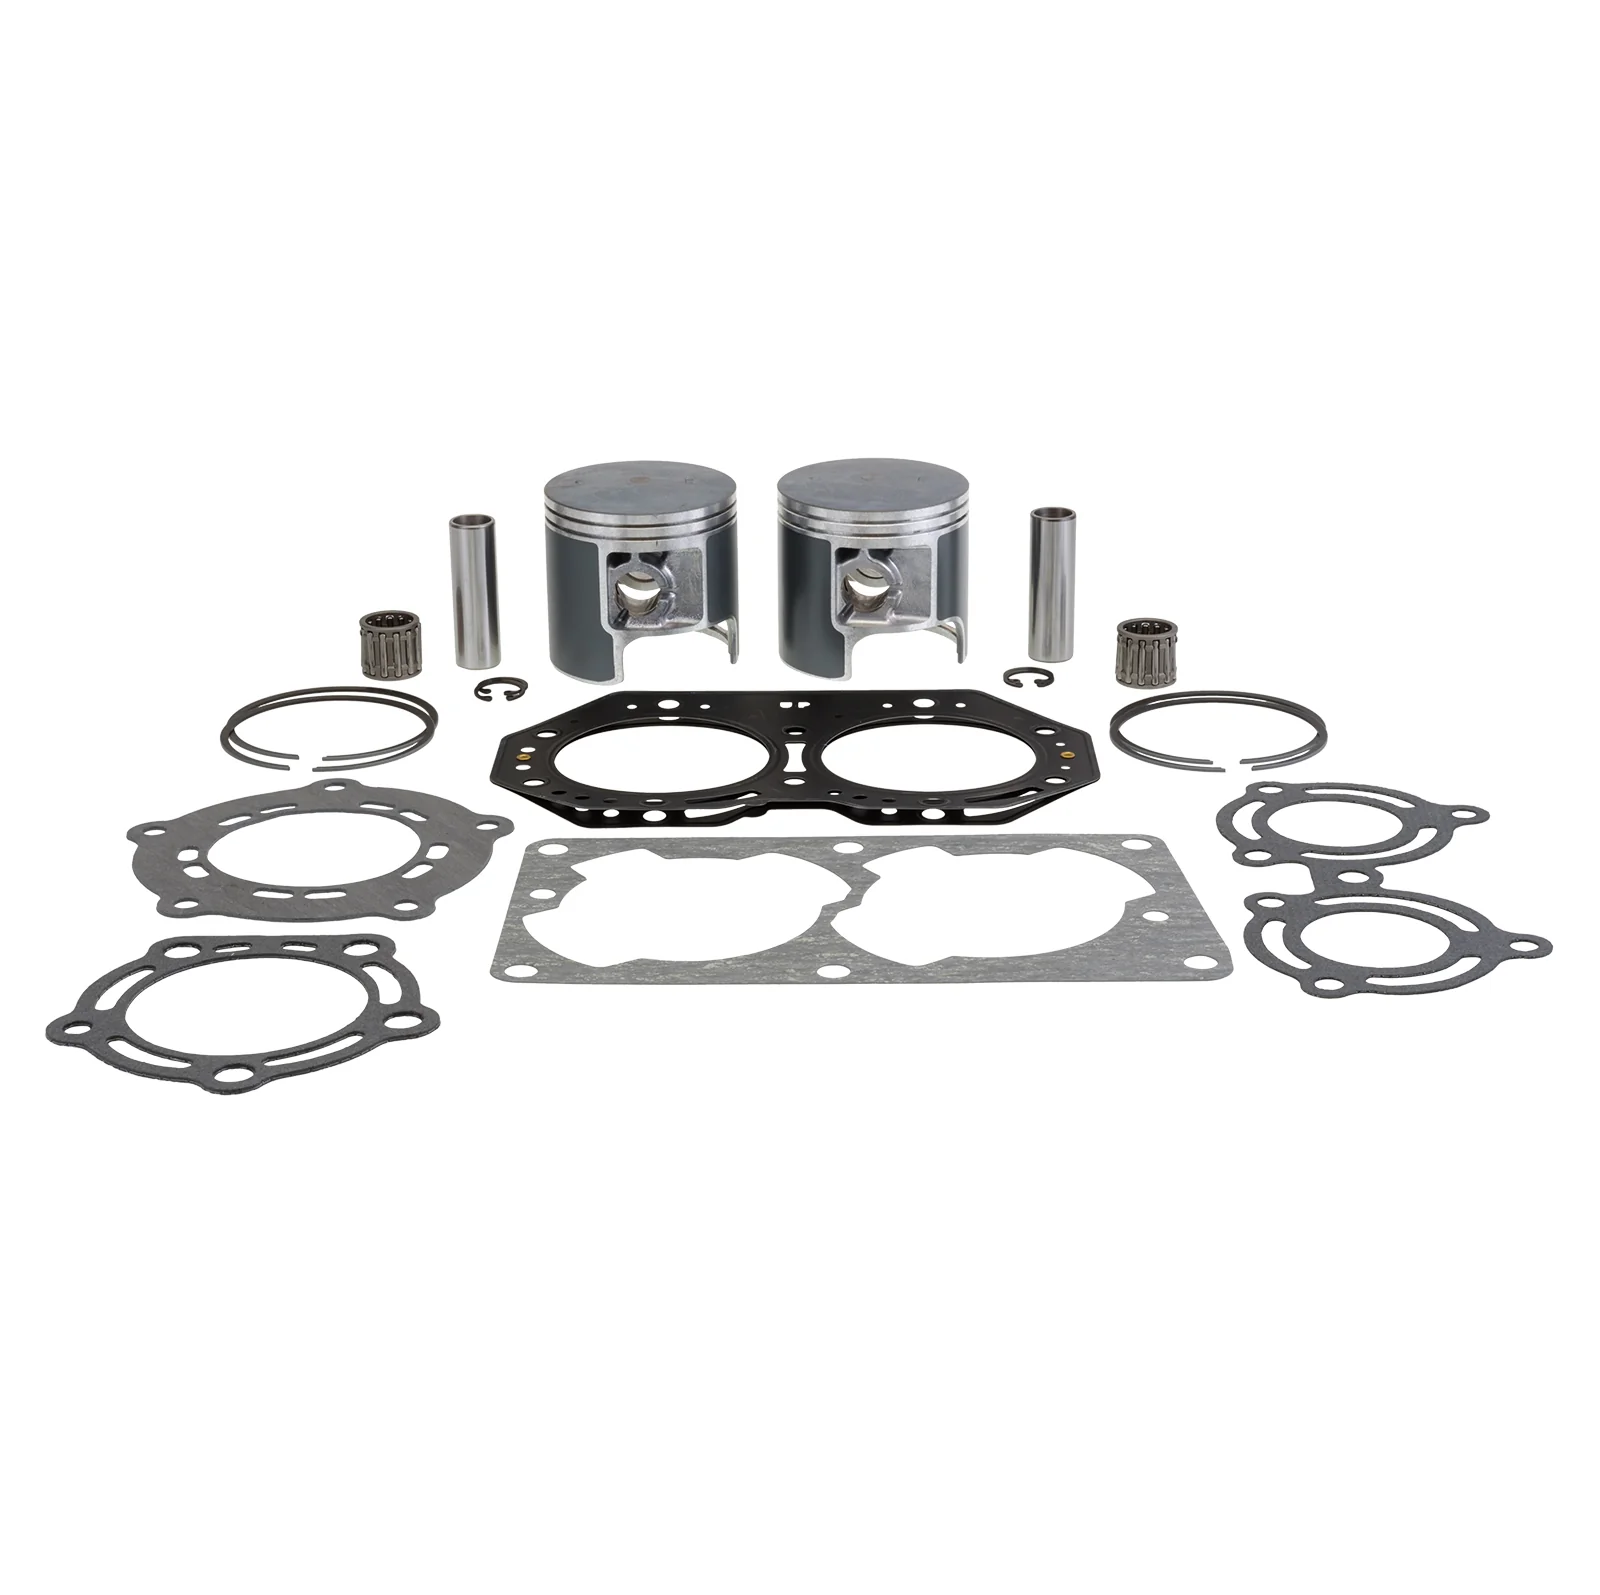
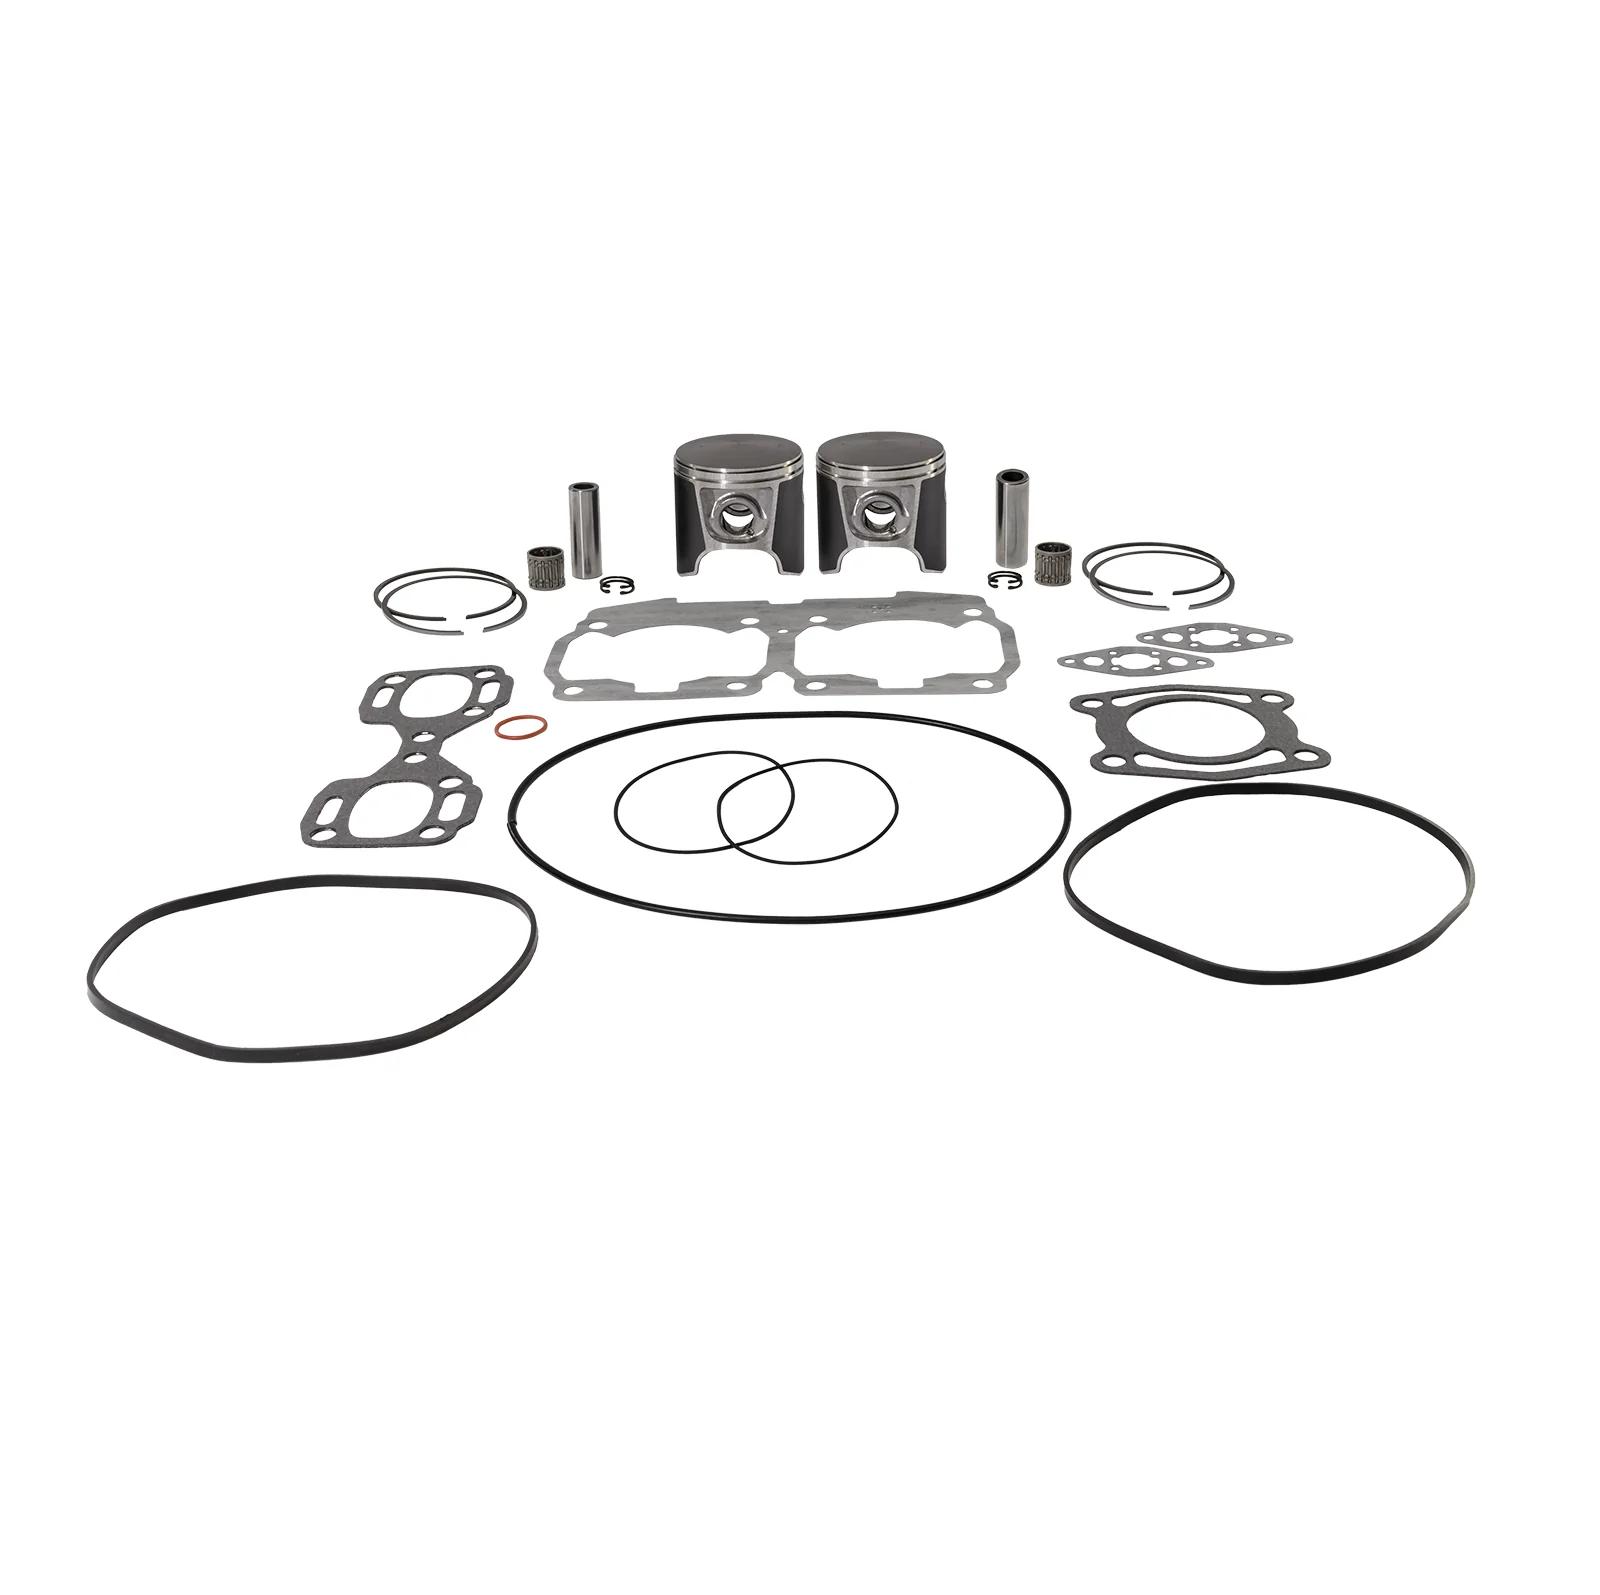
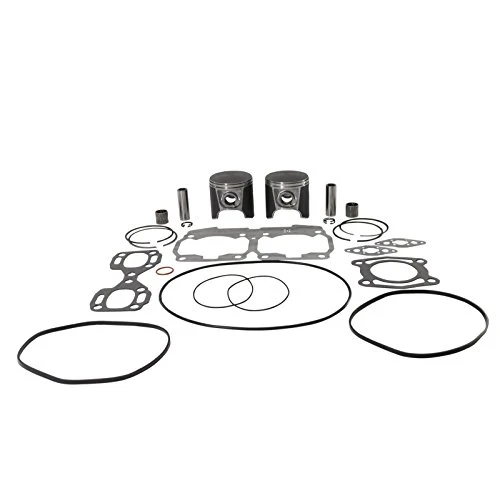
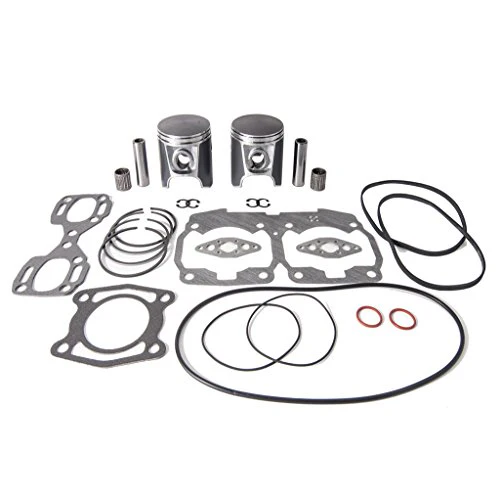
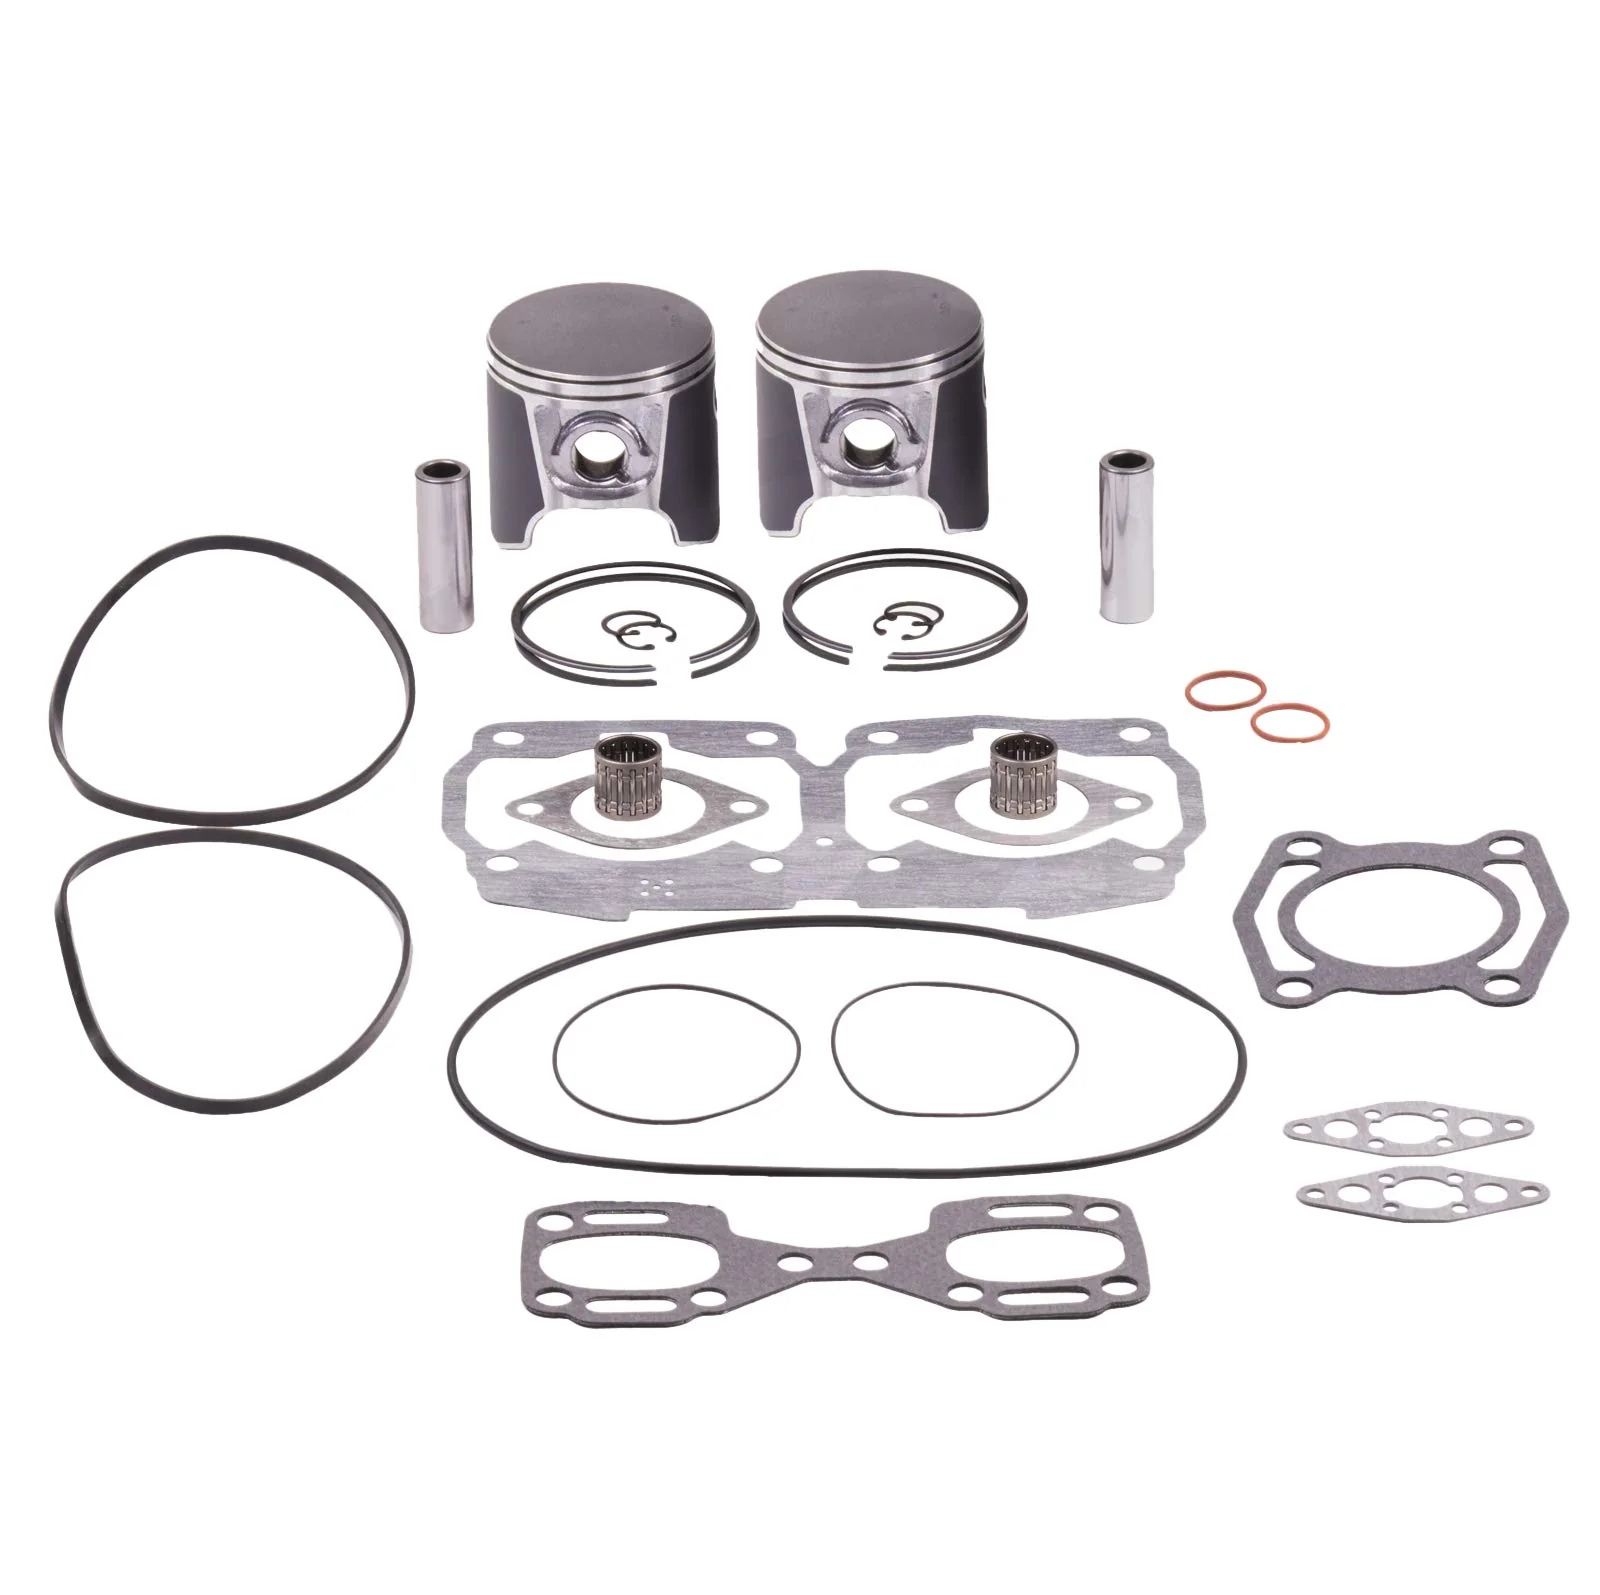
Includes
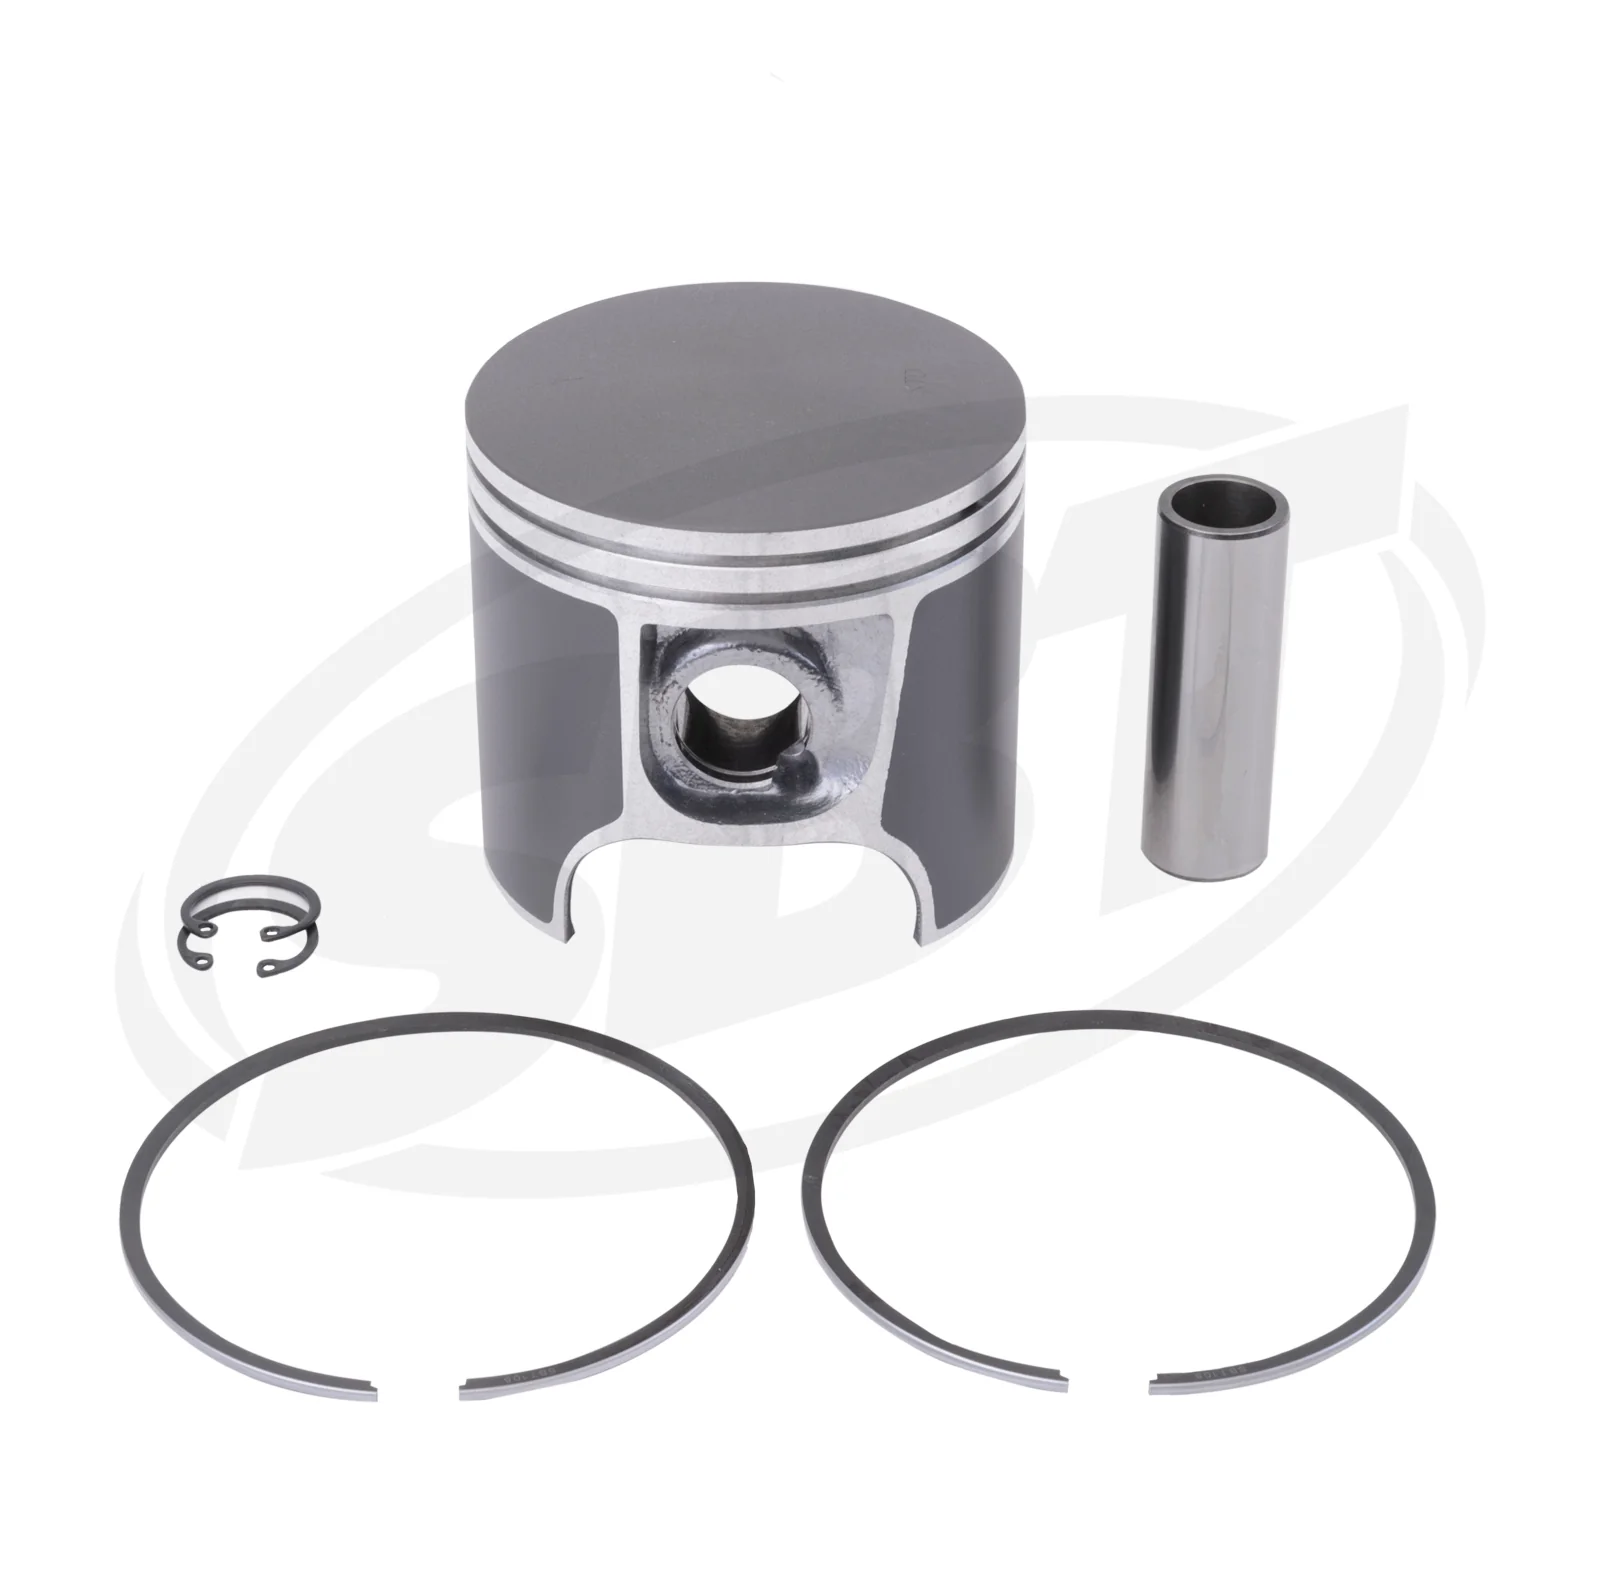
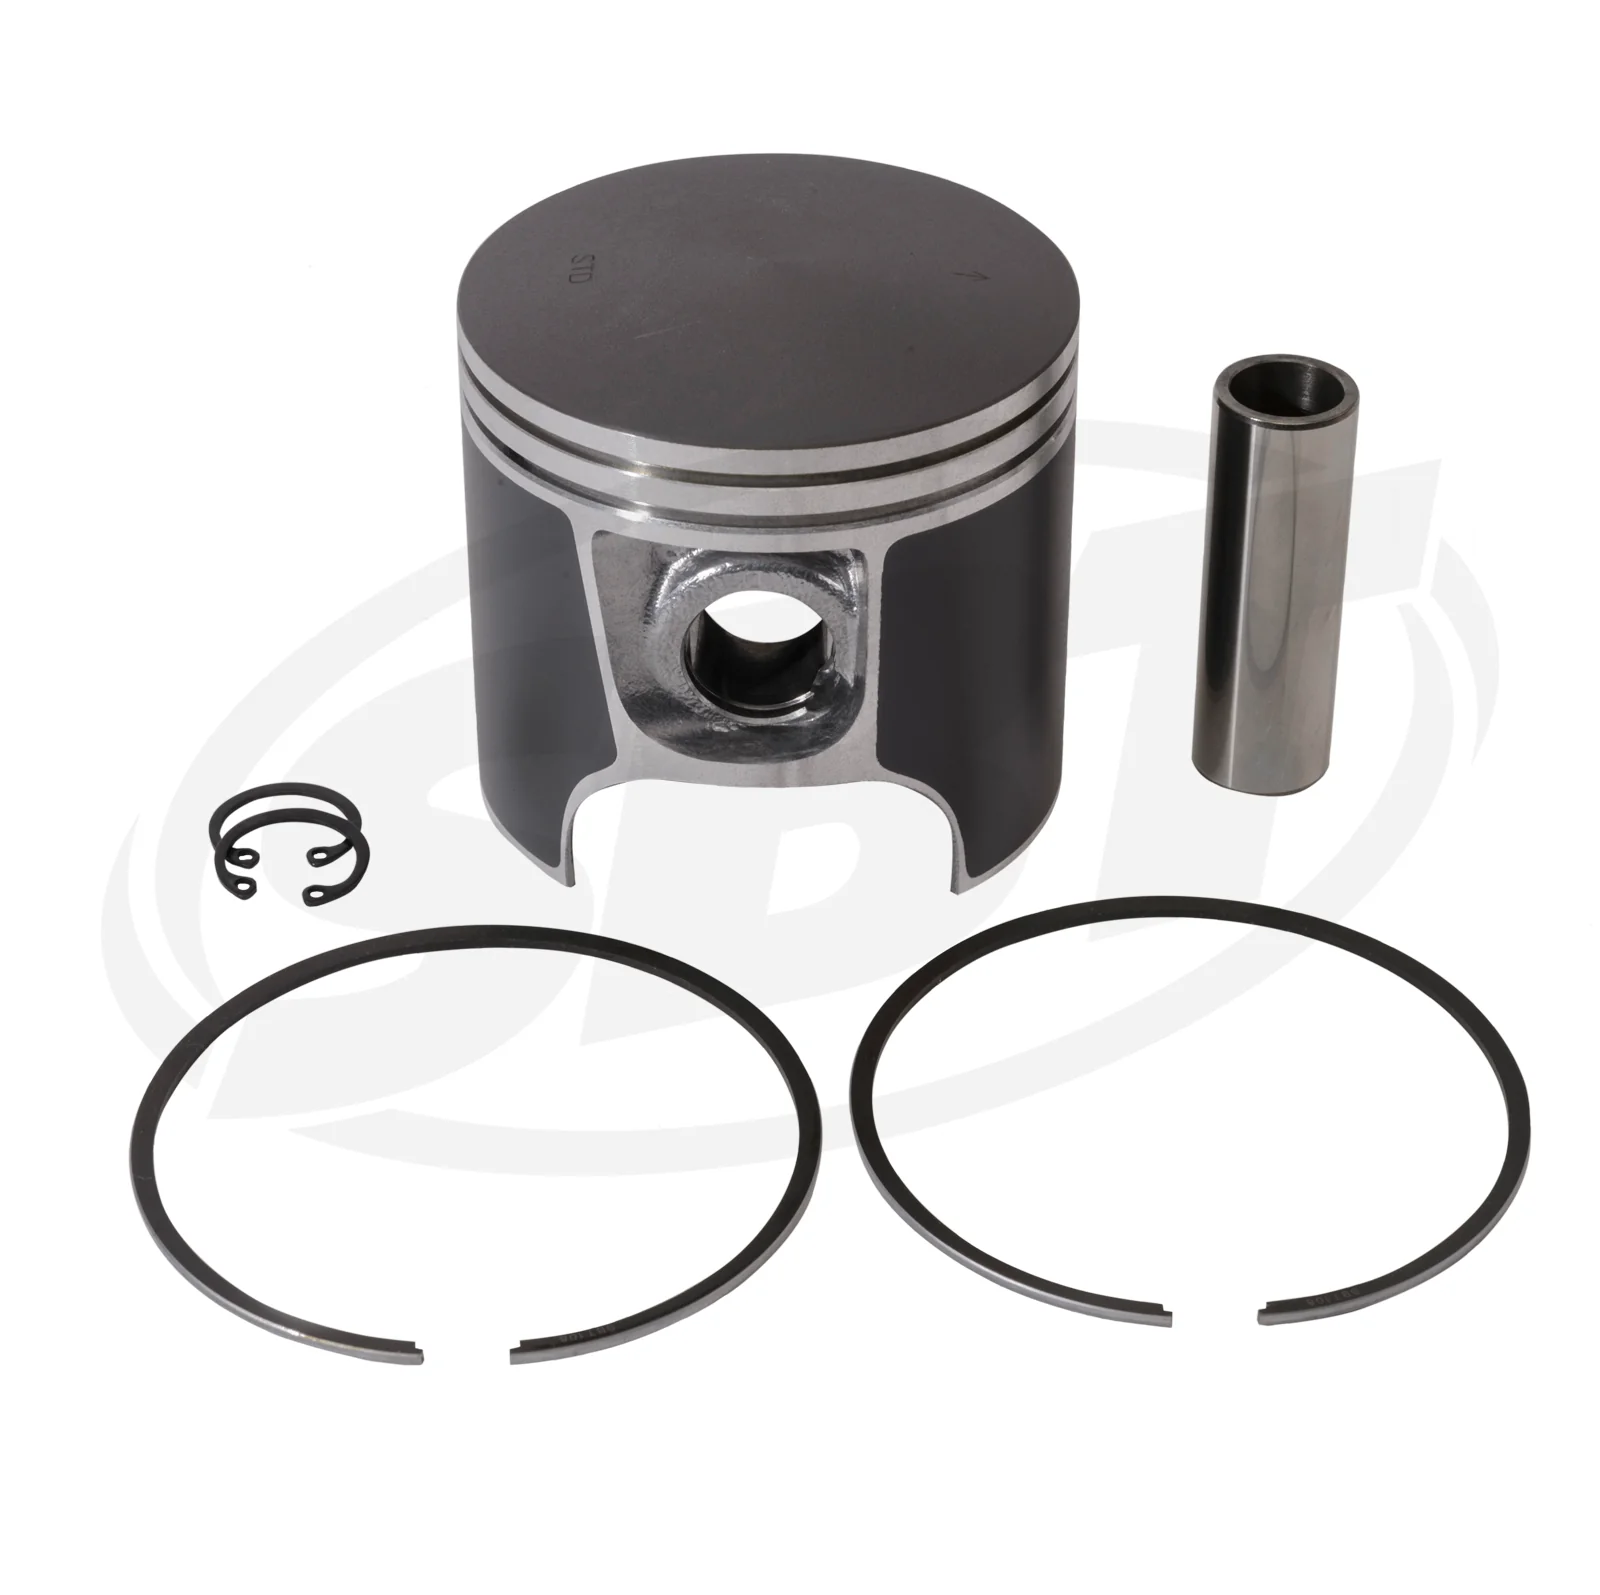
- 2 SBT Pistons
- 2 Ring Sets
- 2 Wrist-Pins
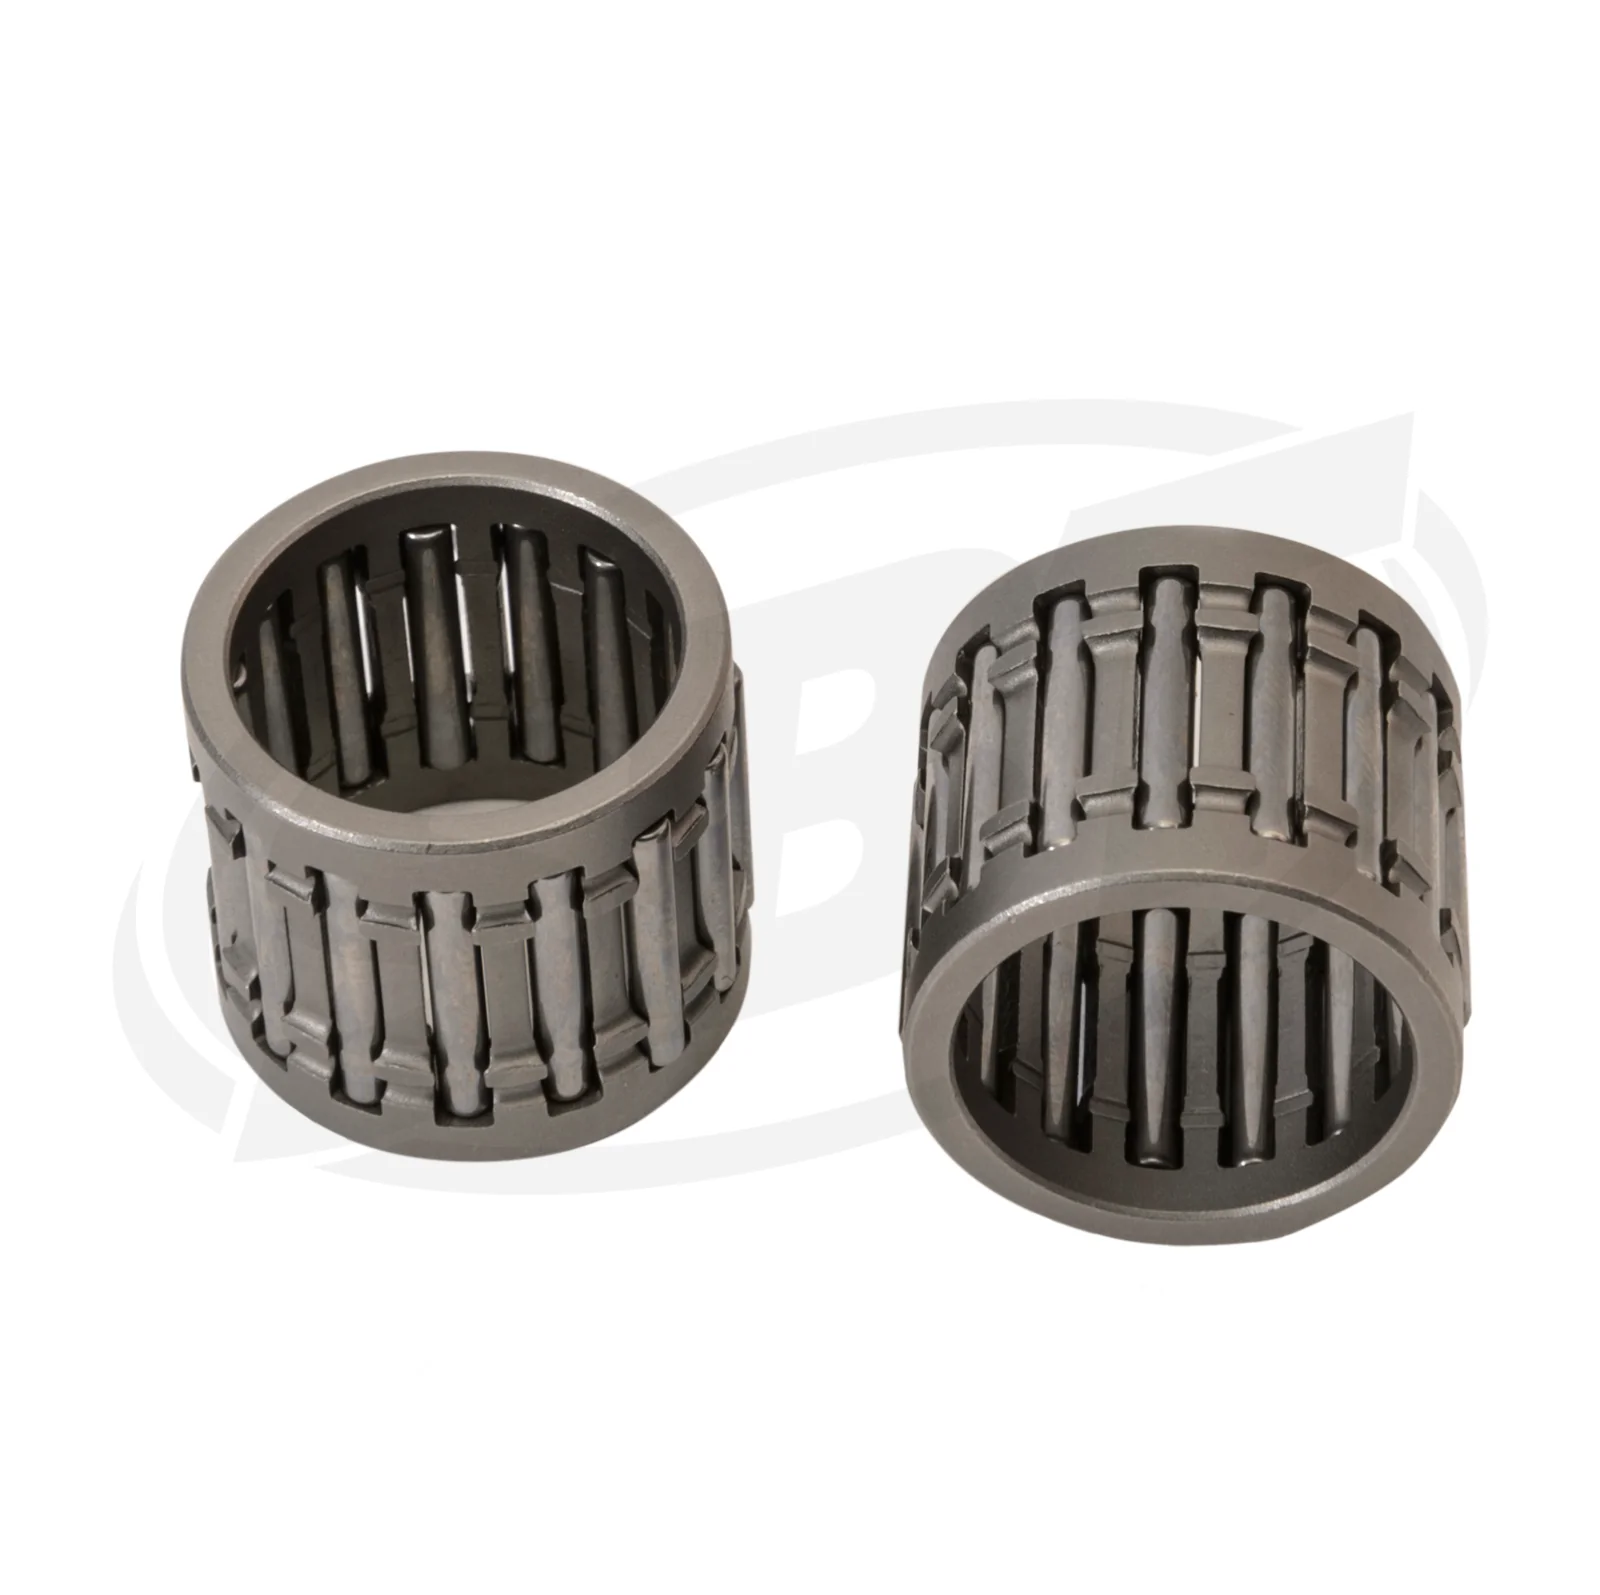
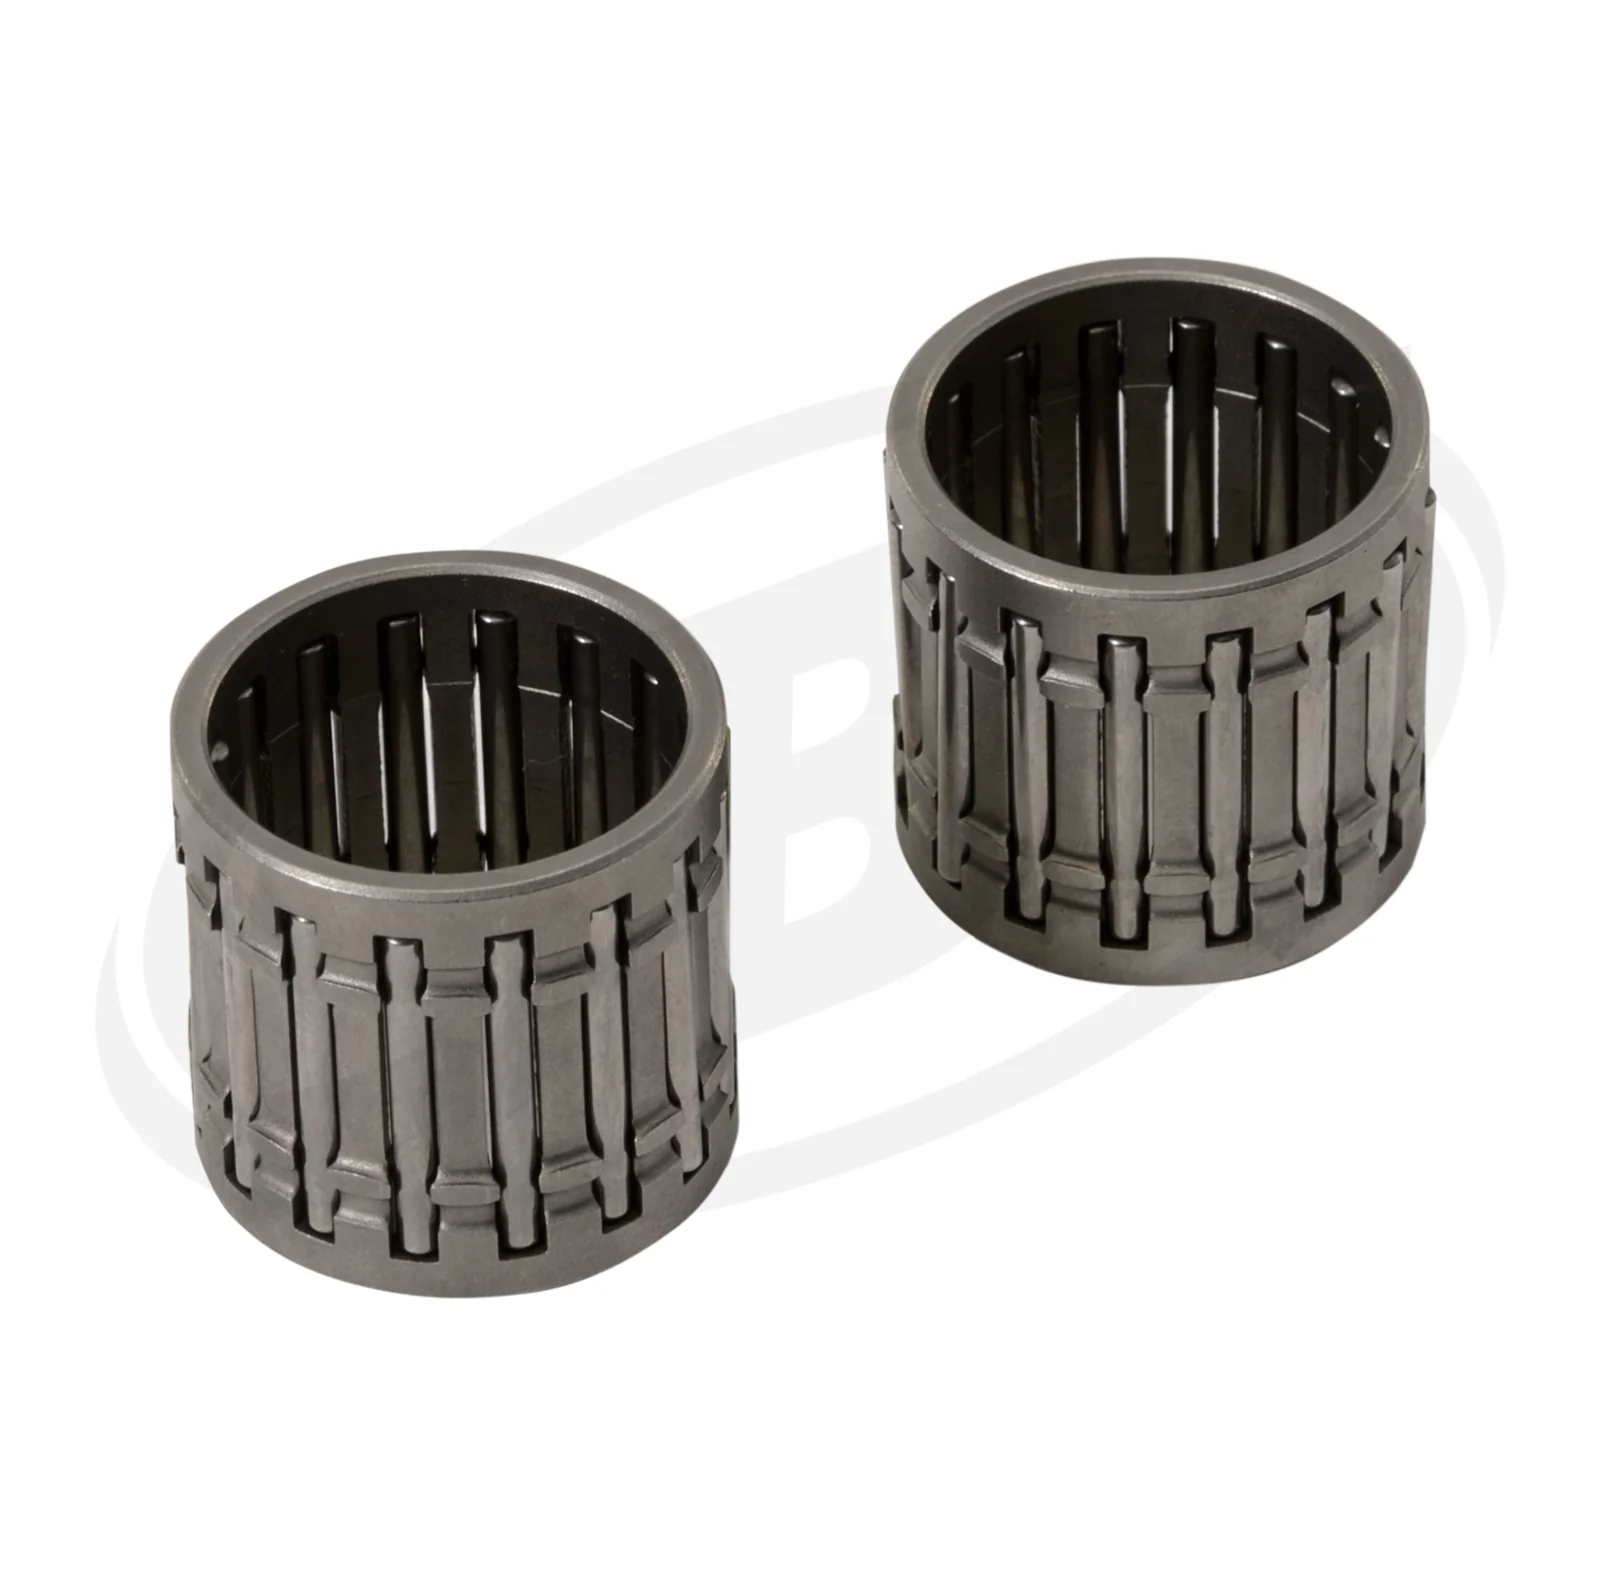
- 2 Wrist-Pin Bearings
- 2 C-Clips
- 1 Base Gasket
- 1 Water Jacket O-Ring Set
- 2 R.A.V.E. Valve Housing Gaskets
- Exhaust Gasket(s).
Please check fitment tab to confirm for your year make and model.
Fitment
Sea-Doo 1995 XP800
Sea-Doo 1996 Challenger
Sea-Doo 1996 GSX
Sea-Doo 1996 GTX
Sea-Doo 1996 XP
Sea-Doo 1997 Challenger
Sea-Doo 1997 Challenger 1800
Sea-Doo 1997 GSX
Sea-Doo 1997 GTX
Sea-Doo 1997 SPX
Sea-Doo 1997 XP
Sea-Doo 1998 Challenger
Sea-Doo 1998 Challenger 1800
Sea-Doo 1998 SPX
Sea-Doo 1999 Challenger 1800
Sea-Doo 1999 SPX
Installation
Piston to Cylinder Clearance:
The piston size plus the clearance equals the final bore size. For the recommended clearances by make and model, see Table 1. The cylinder first should be bored to within 0.002” of the final bore size. The remaining 0.002” should be removed with a 400 grit cylinder hone. The honing process should be controlled such as to leave a 45 degree crosshatch pattern on the cylinder wall.
Port Chamfering:
Once the cylinder is honed to the final size, all of the ports in the cylinder wall should be chamfered with a file or chamfer tool. The chamfered edge should be cut at approximately a 30 degree angle around the entire port. The cylinder should then be honed with a 400 grit flex hone to apply a uniform finish and to re-establish the 45 degree cross-hatch pattern.
Cylinder Cleaning Process:
Clean cylinders in warm soapy water using a firm plastic brush (such as a tooth brush), then dry, and immediately lubricate with 2-stroke oil. Honing grit tends to reside in the crosshatch and must be scrubbed out. An extremely clean cylinder free of grit is critical in order to avoid “drag marks” and other damage to the cylinder wall after assembly.
Setting the Ring Cap:
Place the piston ring in the cylinder. Use the piston to push the ring approximately 5mm from the top of the cylinder in order to square the ring in the cylinder. Use a feeler gauge to measure the gap between the ends of the ring. If the gap is too small, one end of the ring must be filed. Re-install the ring and measure again to confirm the final dimension. Recommended ring gap clearances are shown in Table 2.
Piston Installation:
Install the base gasket (we recommend Threebond 1211 as a gasket treatment). Lubricate the wrist pin bearing with 2-stroke oil and install the piston on the connecting rod. The designation mark on the piston crown points in the direction as shown in Table 3. Install the c-clips with the open end in either the 6 or 12 o'clock position. Install the rings onto the piston. Using your hands or a ring compressor, collapse the rings into the ring grooves and install the cylinder. Torque cylinder to proper torque specifications.
|
Table 1: Piston to Cylinder Clearance |
|
|
Clearance |
Application |
|
2 Stroke |
|
|
.004”-.005” |
Kawasaki 440, 550, 650, 750, 900, 1100 |
|
.0045”-.0055” |
Yamaha 800, 1200pv, 1300 |
|
.005”-.006” |
Seadoo 580, 650, 720, 800 |
|
.007”-.008” |
Polaris 700, 1050 Seadoo 951, 800 RFI |
|
4 Strokes |
|
|
.001”-.0022” |
Seadoo 112 (N/A) |
|
.002”-.004” |
Seadoo 113 (S/C) |
|
.002”-.003” |
Yamaha 408, 410, 411 |
|
.0015”-.0025” |
Kawasaki 213, 214 |
|
.0005”-.0015” |
Honda 600, 601 |
|
Table 2: Ring End Gap |
|
|
Clearance/Tolerance |
Application |
|
2 Strokes |
|
|
.011” +/- .003” |
Kawasaki 1100 |
|
.012” +/- .002” |
Seadoo 800 |
|
.012”+/- .004” |
Kawasaki 440, 550, 650 |
|
.013” +/- .003” |
Seadoo 580, 650, 720 |
|
.013” +/- .005” |
Polaris 650, 700, 750, 780 |
|
.014” +/- .004” |
Polaris 900, 1050 |
|
.019” +/- .001” |
Tigershark 900 |
|
.022” +/- .003” |
Seadoo 951/DI |
|
4 Strokes |
|
|
.015”-.021” |
Yamaha FX Top Ring |
|
.019”-.027” |
Yamaha FX Middle Ring |
|
.011”-.023” |
Yamaha FX Oil Ring |
|
.013”-.017” |
Yamaha VX/FXHO Top Ring |
|
.017”-.023” |
Yamaha VX/FXHO Middle Ring |
|
.004”-.014” |
Yamaha VX/FXHO Oil Ring |
|
.006”-.014” |
Seadoo Top Ring/Middle Ring |
|
.006”-.012” |
Seadoo Oil Ring |
|
.010”-.016” |
Kawasaki Top Ring |
|
.016”-.022” |
Kawasaki Middle Ring |
|
.016”-.023” |
Kawasaki Oil Ring |
|
.007”-.013” |
Honda Top Ring |
|
.016”-.022” |
Honda Middle Ring |
|
.010”-.030” |
Honda Oil Ring |
|
Table 3: Piston Arrow Direction |
|
|
|
|
Make |
Engine |
Marking |
Position |
|
Seadoo |
All |
Arrow |
Towards exhaust |
|
Kawasaki |
All (except 4-stroke) |
Arrow |
Towards Exhaust |
|
Kawasaki |
4-strokes |
Dot |
Towards exhaust |
|
Polaris |
650, 750, 780 |
Arrow |
Towards front |
|
Polaris |
700, 900, 1050 |
Arrow |
Towards exhaust |
|
Yamaha |
500 |
“UP” |
Towards front |
|
Yamaha |
All others |
Arrow |
Towards exhaust |
|
Tigershark |
640, 1000 |
Arrow |
Towards exhaust |
|
Tigershark |
770, 900 |
Dot |
Towards exhaust |
|
Honda |
4-strokes |
In |
On the intake side |
Warranty

Details & Craftsmanship
Every detail has been carefully considered to bring you the perfect product.
Details & Craftsmanship
Every detail has been carefully considered to bring you the perfect product.

Details & Craftsmanship
Every detail has been carefully considered to bring you the perfect product.

Details & Craftsmanship
Every detail has been carefully considered to bring you the perfect product.
Details & Craftsmanship
Every detail has been carefully considered to bring you the perfect product.
Details & Craftsmanship
Every detail has been carefully considered to bring you the perfect product.
Details & Craftsmanship
Every detail has been carefully considered to bring you the perfect product.
Description
Description
Includes
- 2 SBT Pistons
- 2 Ring Sets
- 2 Wrist-Pins
- 2 Wrist-Pin Bearings
- 2 C-Clips
- 1 Base Gasket
- 1 Water Jacket O-Ring Set
- 2 R.A.V.E. Valve Housing Gaskets
- Exhaust Gasket(s).
Please check fitment tab to confirm for your year make and model.
Fitment
Sea-Doo 1995 XP800
Sea-Doo 1996 Challenger
Sea-Doo 1996 GSX
Sea-Doo 1996 GTX
Sea-Doo 1996 XP
Sea-Doo 1997 Challenger
Sea-Doo 1997 Challenger 1800
Sea-Doo 1997 GSX
Sea-Doo 1997 GTX
Sea-Doo 1997 SPX
Sea-Doo 1997 XP
Sea-Doo 1998 Challenger
Sea-Doo 1998 Challenger 1800
Sea-Doo 1998 SPX
Sea-Doo 1999 Challenger 1800
Sea-Doo 1999 SPX
Installation
Piston to Cylinder Clearance:
The piston size plus the clearance equals the final bore size. For the recommended clearances by make and model, see Table 1. The cylinder first should be bored to within 0.002” of the final bore size. The remaining 0.002” should be removed with a 400 grit cylinder hone. The honing process should be controlled such as to leave a 45 degree crosshatch pattern on the cylinder wall.
Port Chamfering:
Once the cylinder is honed to the final size, all of the ports in the cylinder wall should be chamfered with a file or chamfer tool. The chamfered edge should be cut at approximately a 30 degree angle around the entire port. The cylinder should then be honed with a 400 grit flex hone to apply a uniform finish and to re-establish the 45 degree cross-hatch pattern.
Cylinder Cleaning Process:
Clean cylinders in warm soapy water using a firm plastic brush (such as a tooth brush), then dry, and immediately lubricate with 2-stroke oil. Honing grit tends to reside in the crosshatch and must be scrubbed out. An extremely clean cylinder free of grit is critical in order to avoid “drag marks” and other damage to the cylinder wall after assembly.
Setting the Ring Cap:
Place the piston ring in the cylinder. Use the piston to push the ring approximately 5mm from the top of the cylinder in order to square the ring in the cylinder. Use a feeler gauge to measure the gap between the ends of the ring. If the gap is too small, one end of the ring must be filed. Re-install the ring and measure again to confirm the final dimension. Recommended ring gap clearances are shown in Table 2.
Piston Installation:
Install the base gasket (we recommend Threebond 1211 as a gasket treatment). Lubricate the wrist pin bearing with 2-stroke oil and install the piston on the connecting rod. The designation mark on the piston crown points in the direction as shown in Table 3. Install the c-clips with the open end in either the 6 or 12 o'clock position. Install the rings onto the piston. Using your hands or a ring compressor, collapse the rings into the ring grooves and install the cylinder. Torque cylinder to proper torque specifications.
|
Table 1: Piston to Cylinder Clearance |
|
|
Clearance |
Application |
|
2 Stroke |
|
|
.004”-.005” |
Kawasaki 440, 550, 650, 750, 900, 1100 |
|
.0045”-.0055” |
Yamaha 800, 1200pv, 1300 |
|
.005”-.006” |
Seadoo 580, 650, 720, 800 |
|
.007”-.008” |
Polaris 700, 1050 Seadoo 951, 800 RFI |
|
4 Strokes |
|
|
.001”-.0022” |
Seadoo 112 (N/A) |
|
.002”-.004” |
Seadoo 113 (S/C) |
|
.002”-.003” |
Yamaha 408, 410, 411 |
|
.0015”-.0025” |
Kawasaki 213, 214 |
|
.0005”-.0015” |
Honda 600, 601 |
|
Table 2: Ring End Gap |
|
|
Clearance/Tolerance |
Application |
|
2 Strokes |
|
|
.011” +/- .003” |
Kawasaki 1100 |
|
.012” +/- .002” |
Seadoo 800 |
|
.012”+/- .004” |
Kawasaki 440, 550, 650 |
|
.013” +/- .003” |
Seadoo 580, 650, 720 |
|
.013” +/- .005” |
Polaris 650, 700, 750, 780 |
|
.014” +/- .004” |
Polaris 900, 1050 |
|
.019” +/- .001” |
Tigershark 900 |
|
.022” +/- .003” |
Seadoo 951/DI |
|
4 Strokes |
|
|
.015”-.021” |
Yamaha FX Top Ring |
|
.019”-.027” |
Yamaha FX Middle Ring |
|
.011”-.023” |
Yamaha FX Oil Ring |
|
.013”-.017” |
Yamaha VX/FXHO Top Ring |
|
.017”-.023” |
Yamaha VX/FXHO Middle Ring |
|
.004”-.014” |
Yamaha VX/FXHO Oil Ring |
|
.006”-.014” |
Seadoo Top Ring/Middle Ring |
|
.006”-.012” |
Seadoo Oil Ring |
|
.010”-.016” |
Kawasaki Top Ring |
|
.016”-.022” |
Kawasaki Middle Ring |
|
.016”-.023” |
Kawasaki Oil Ring |
|
.007”-.013” |
Honda Top Ring |
|
.016”-.022” |
Honda Middle Ring |
|
.010”-.030” |
Honda Oil Ring |
|
Table 3: Piston Arrow Direction |
|
|
|
|
Make |
Engine |
Marking |
Position |
|
Seadoo |
All |
Arrow |
Towards exhaust |
|
Kawasaki |
All (except 4-stroke) |
Arrow |
Towards Exhaust |
|
Kawasaki |
4-strokes |
Dot |
Towards exhaust |
|
Polaris |
650, 750, 780 |
Arrow |
Towards front |
|
Polaris |
700, 900, 1050 |
Arrow |
Towards exhaust |
|
Yamaha |
500 |
“UP” |
Towards front |
|
Yamaha |
All others |
Arrow |
Towards exhaust |
|
Tigershark |
640, 1000 |
Arrow |
Towards exhaust |
|
Tigershark |
770, 900 |
Dot |
Towards exhaust |
|
Honda |
4-strokes |
In |
On the intake side |